
Paying your invoice via the QR code on the bill is quick and easy. Please follow these steps:
Scan the QR code: Scan the QR code using your phone's camera or a QR code reader app.
Important: This code contains a link to a specific website. It cannot be scanned using banking mobile apps (e.g., OTP Bank app). Make sure the QR code is clean and clearly visible.
Open the link: Modern smartphone cameras automatically recognize the code and display the link. Click on this link.
Verify the details: The link will open the
saghysat.hu/simplepaywebsite in your browser, with the fields pre-filled with your invoice details.Initiate payment: Accept the Terms and Conditions (GTC / ÁSZF) and click the "Befizetés indítása" (Start Payment) button.
Secure payment: You will be redirected to the secure SimplePay platform, where the actual payment takes place based on the provided details.
Redirection and confirmation: After payment, please wait to be redirected back to the original
saghysat.hu/simplepaypage. A countdown timer will show that the payment is being processed.Successful payment: The page will update and display the transaction details (e.g., transaction ID).
Failed payment: The page will display the reason for the failed transaction.
Retuning the Econ TV box
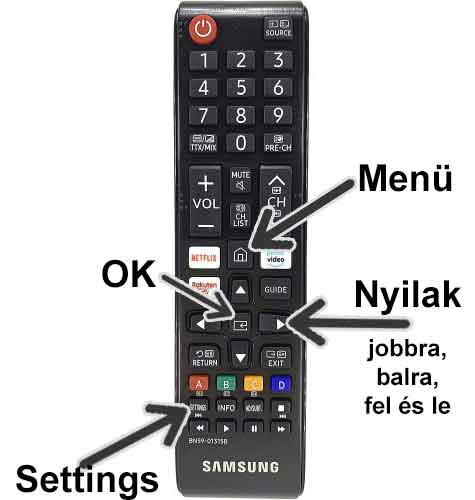
Press the Menu button located above the 4 arrows on the remote control.
(On some remote controls, this is located to the top-left of the arrows, on others, it is below the arrows.)
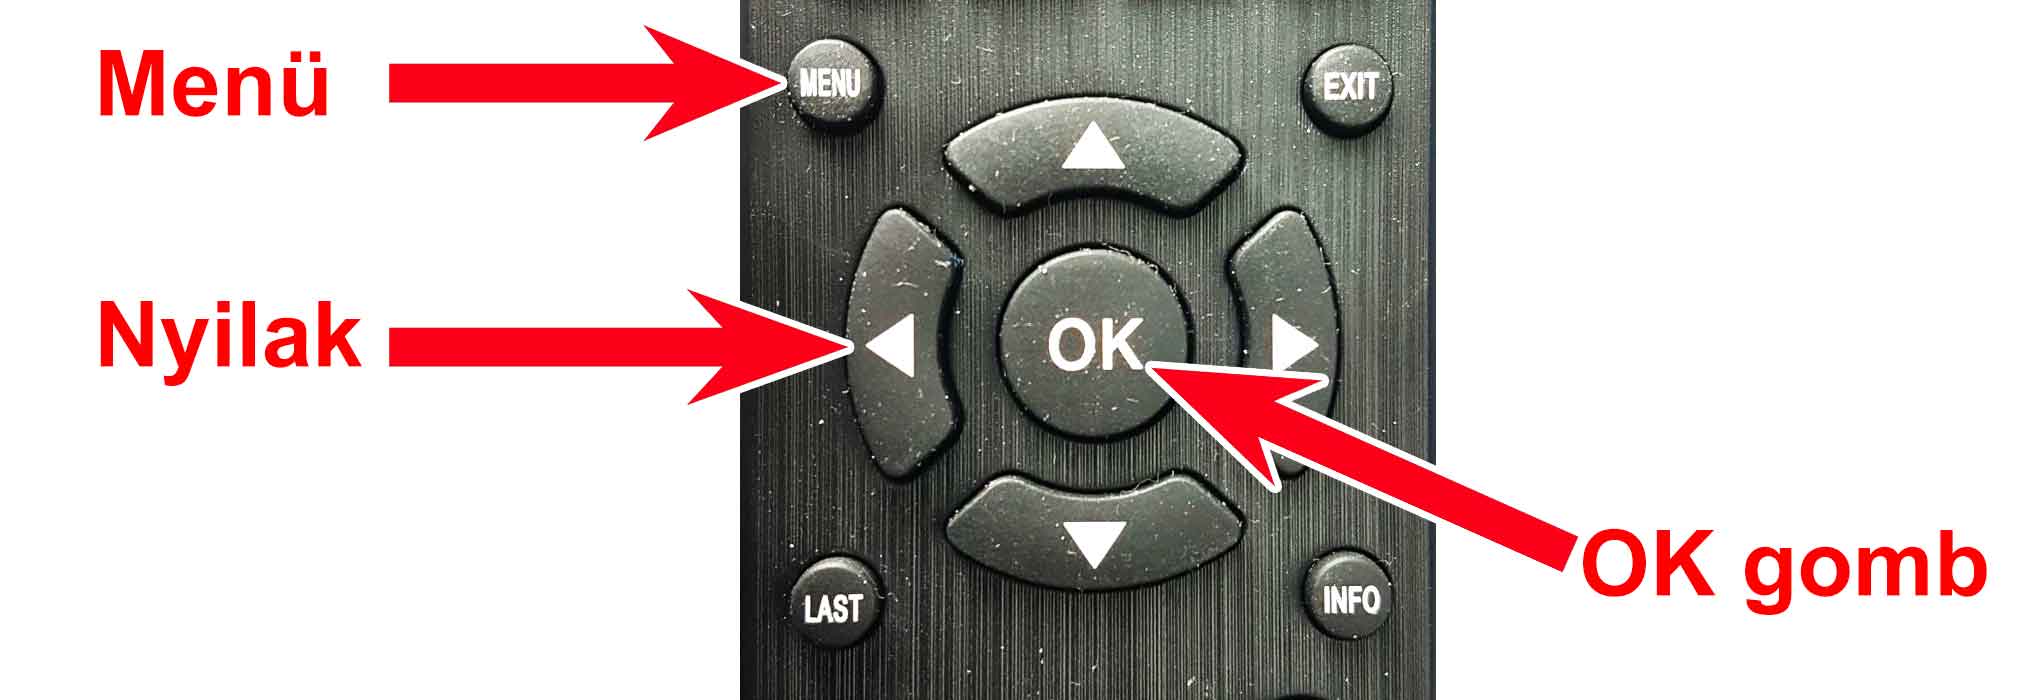
The setup options will now appear on the screen. From the small circles in the bottom row, use the left or right arrows on the remote control to select the Search (Keresés) menu item, marked with a magnifying glass icon. Press the OK button on the remote to enter the Search menu.
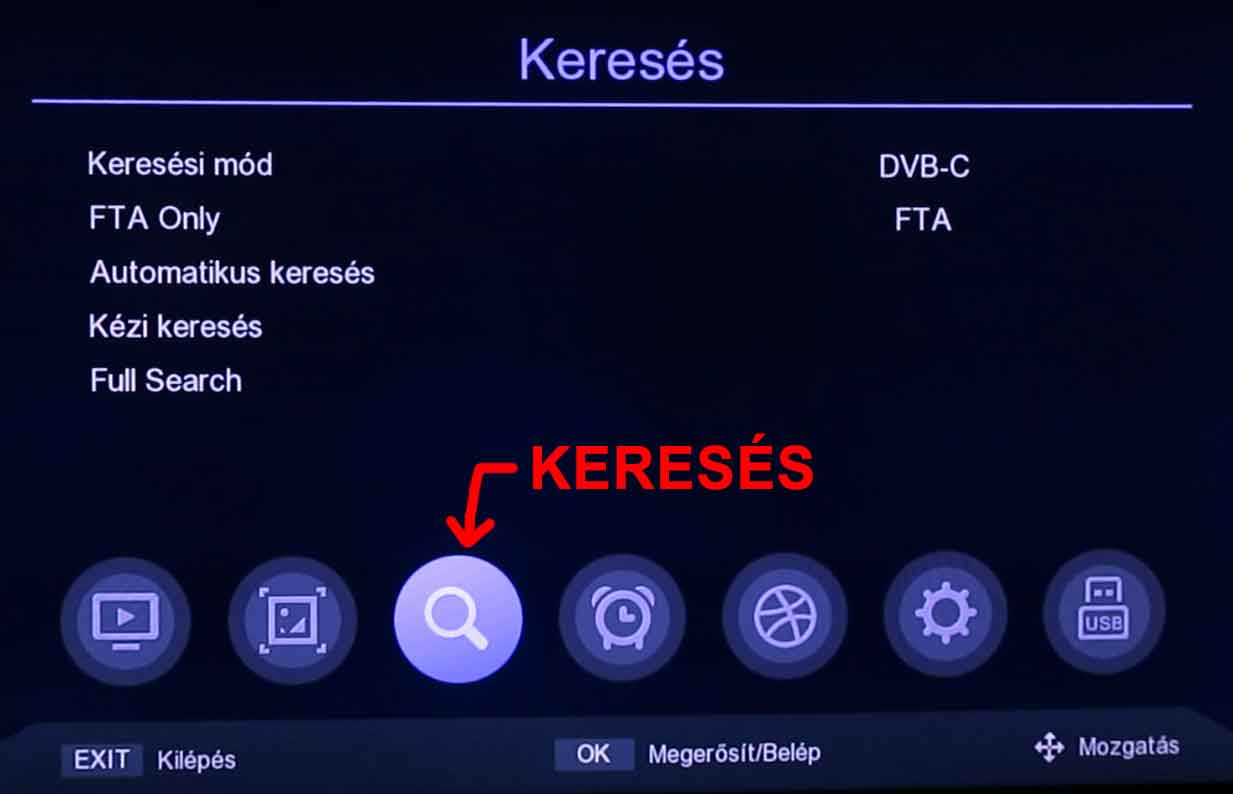
Once inside the search menu, you can navigate between the menu items using the up and down arrows on the remote control. You can change individual settings using the right and left arrows.
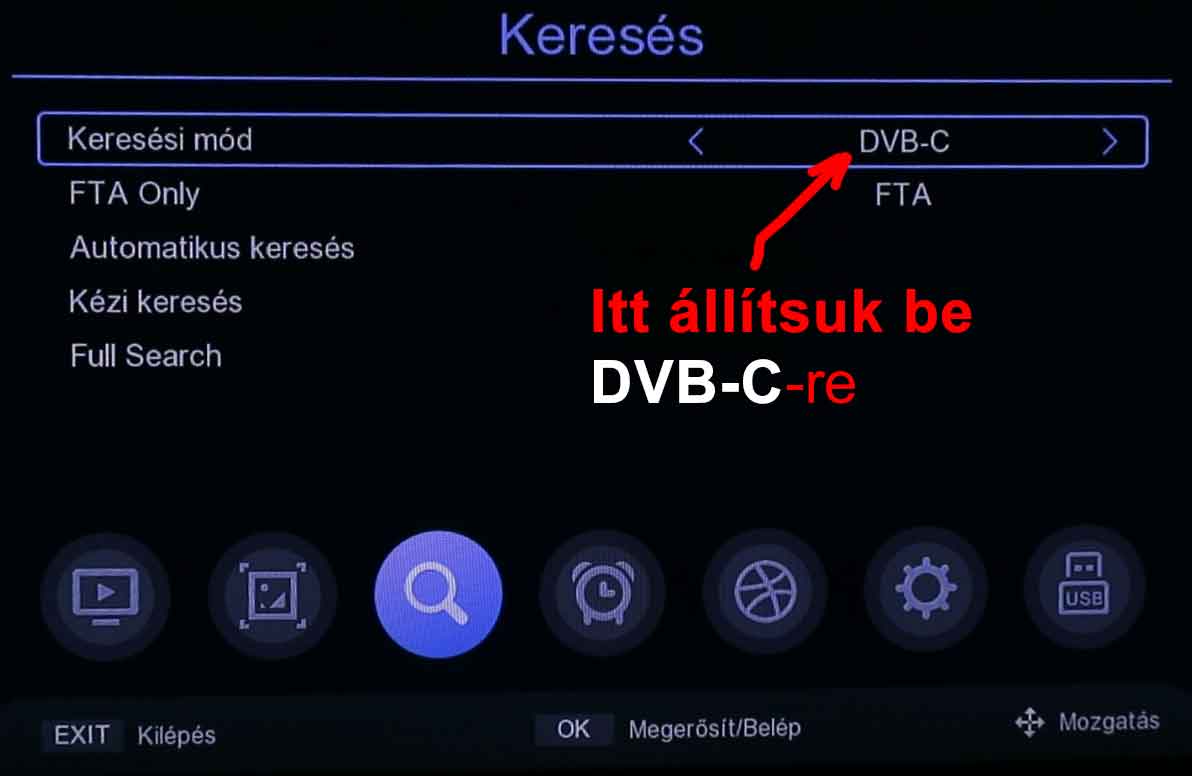
Check if the Search Mode (Keresési mód): is set to DVB-C. If not, use the up or down arrows to select the Search Mode item, then press the left or right arrow repeatedly until DVB-C appears.
Similarly, check if the FTA Search is set to FTA, and if necessary, adjust it to FTA.
Then select Auto Search (Automatikus keresés) and press the OK button on the remote control.

To the appearing question: "Törli az összes csatornát az automatikus kereséshez?" (Delete all channels for auto search?)

Confirm by pressing the OK button on the remote control.
The search process will now begin... please wait patiently.
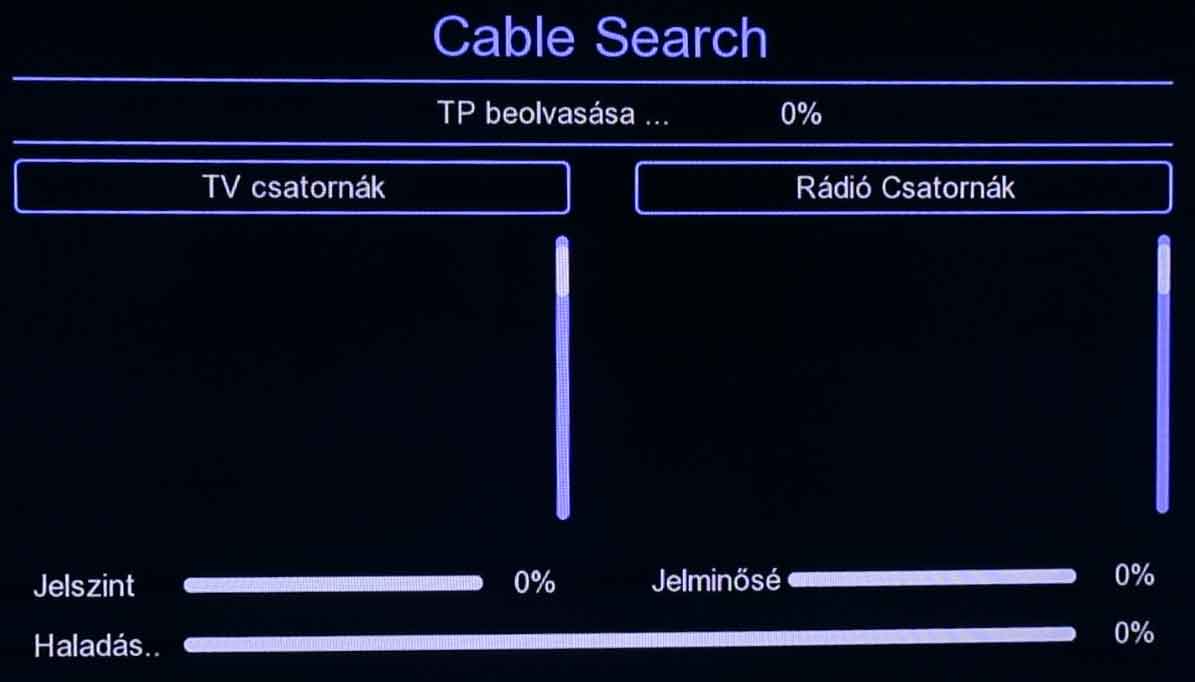
The search may take more than ten minutes!
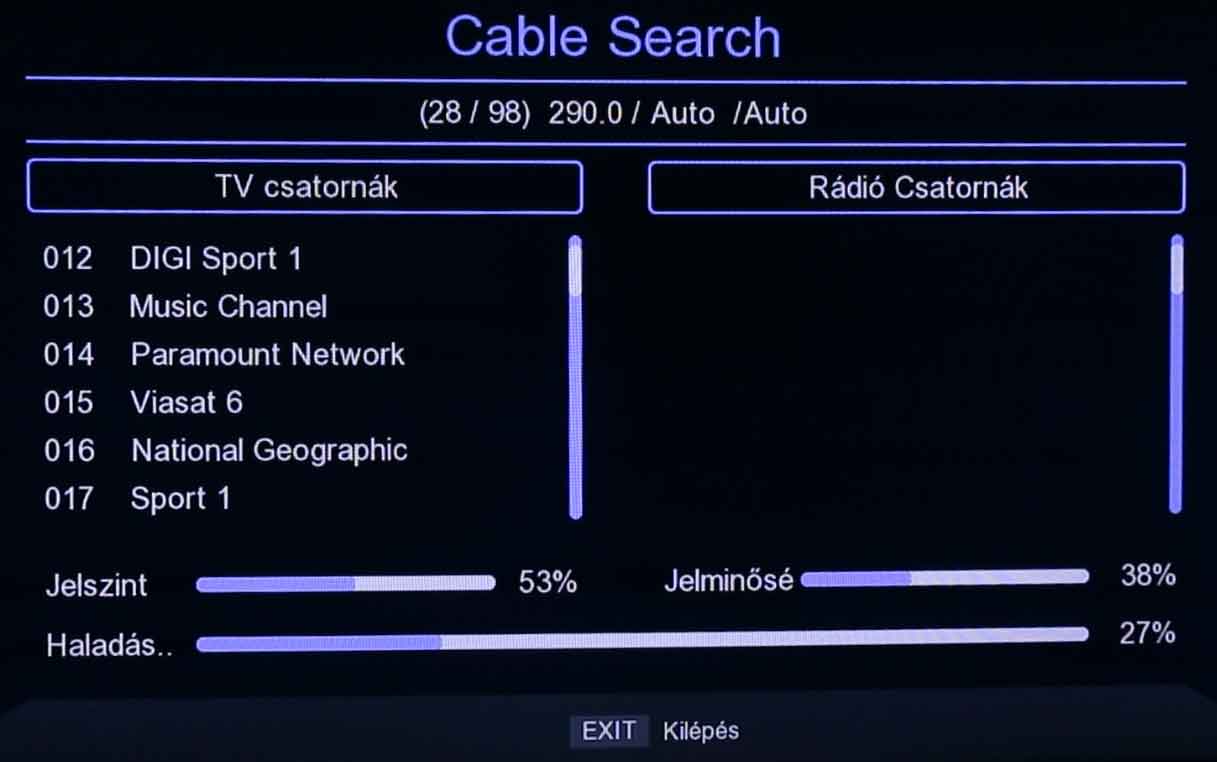
When the search is complete, the message “Mentés, kérem várjon …” (Saving, please wait...) will appear. At this time, it is memorizing the found channels.

The menu will disappear automatically, and the first TV channel will appear.
The BOX has been successfully retuned!

Congratulations!
Press the Home (Smart Hub / házikó) button located above the 4 arrows on the remote control.
(Or if you press the Settings button, the settings screen will appear immediately. In this case: click here!)
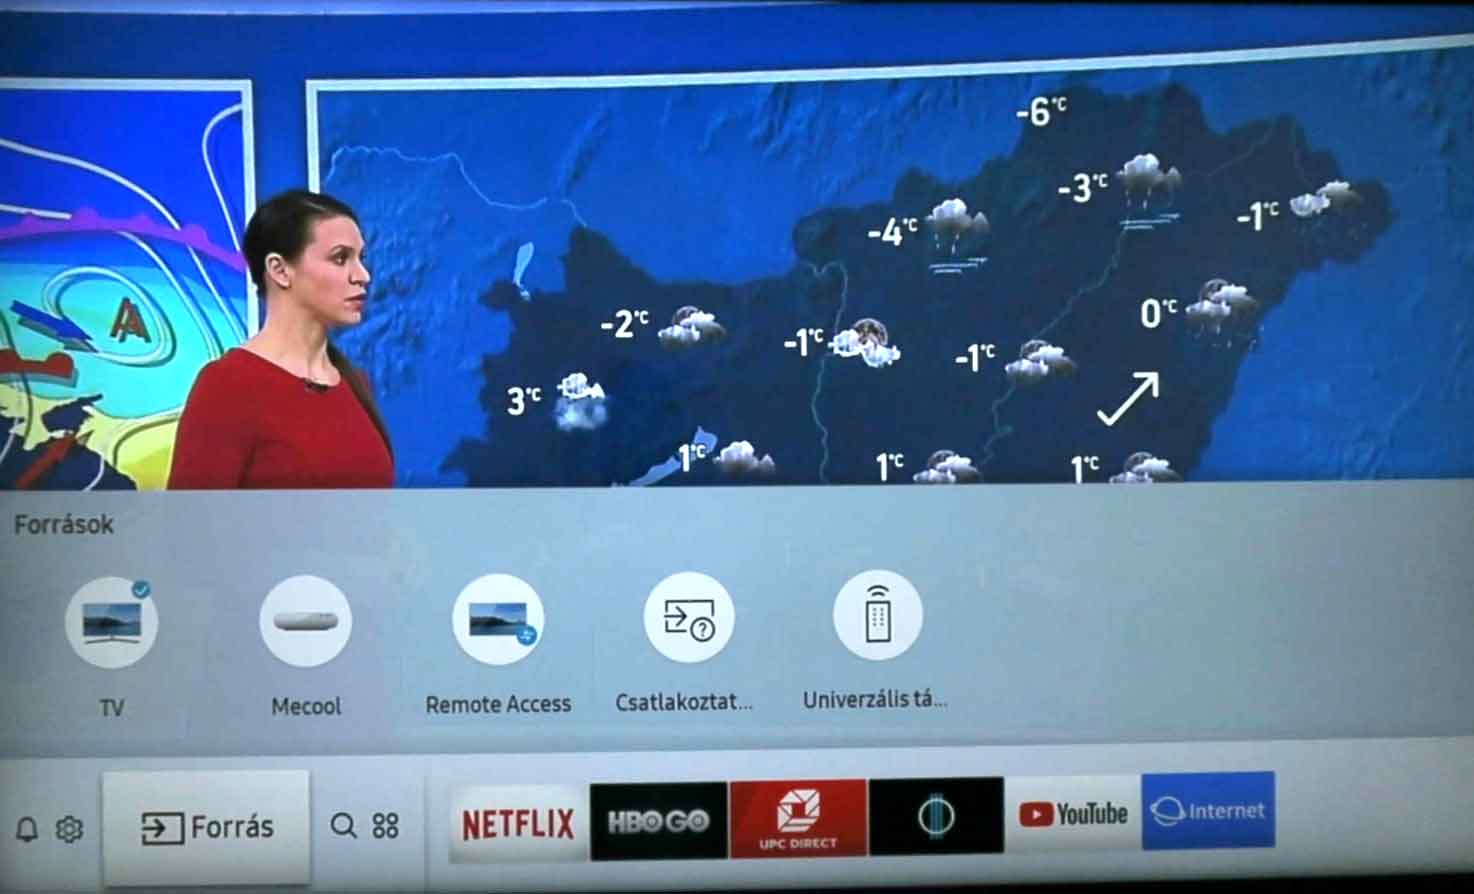
The setup options will now appear on the screen.
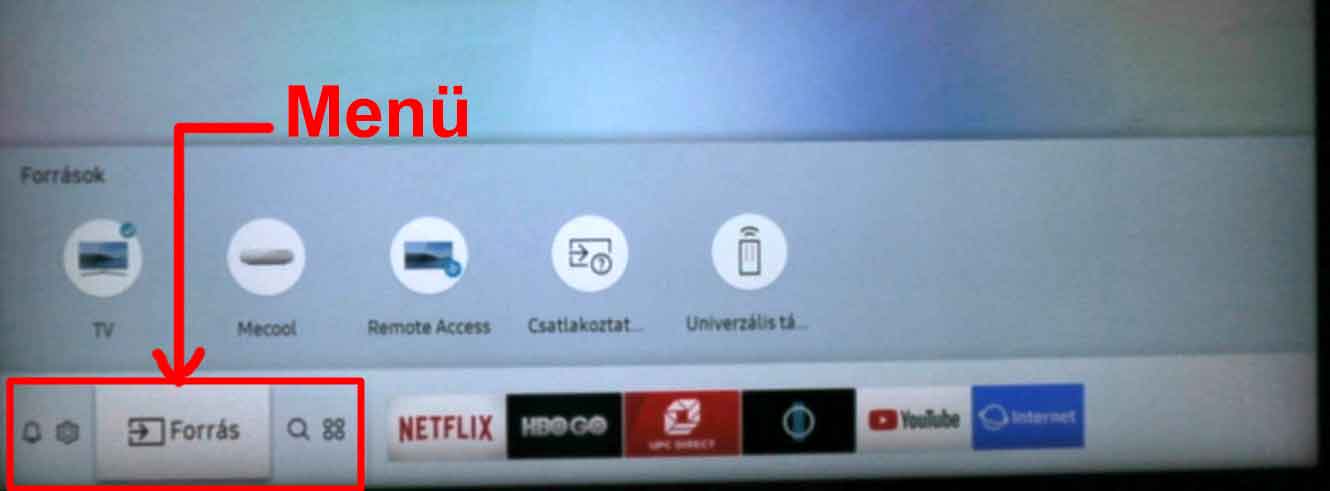
Use the left or right arrows on the remote control to navigate to the gear icon representing Settings.
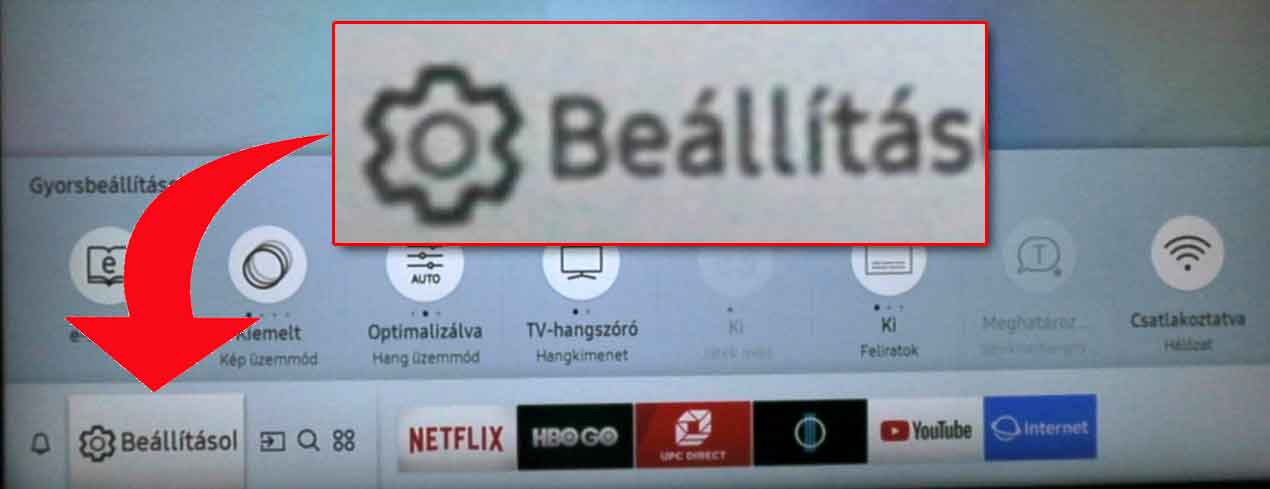
(If you press the Settings button, the following screen will appear immediately.)
On this screen, you can choose from various settings such as Picture, Sound, Broadcasting (Adás), General, Support.
A small shadow appears behind the circle representing the currently selected menu item.
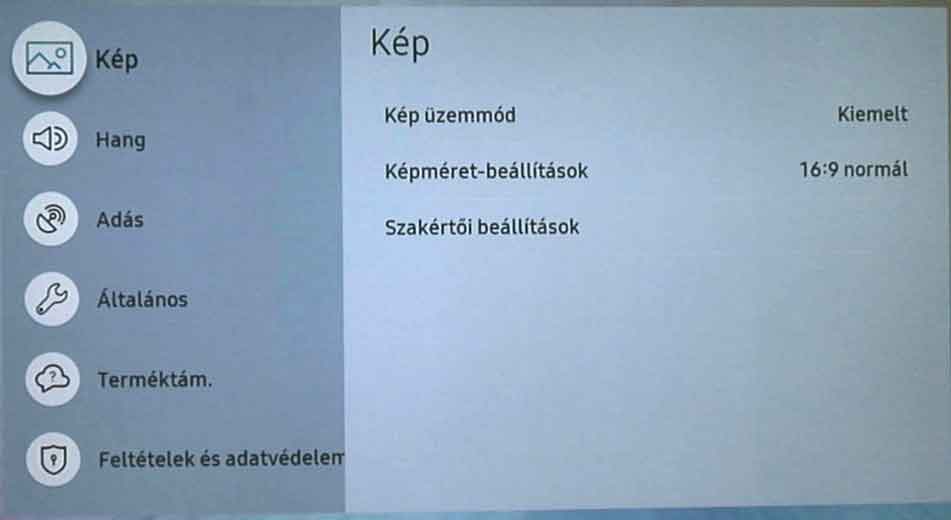
You can navigate between the main options using the up and down arrows on the remote control. Select the Broadcasting (Adás) menu item.
Then press the OK button in the middle of the remote control arrows to open the Broadcasting submenu.
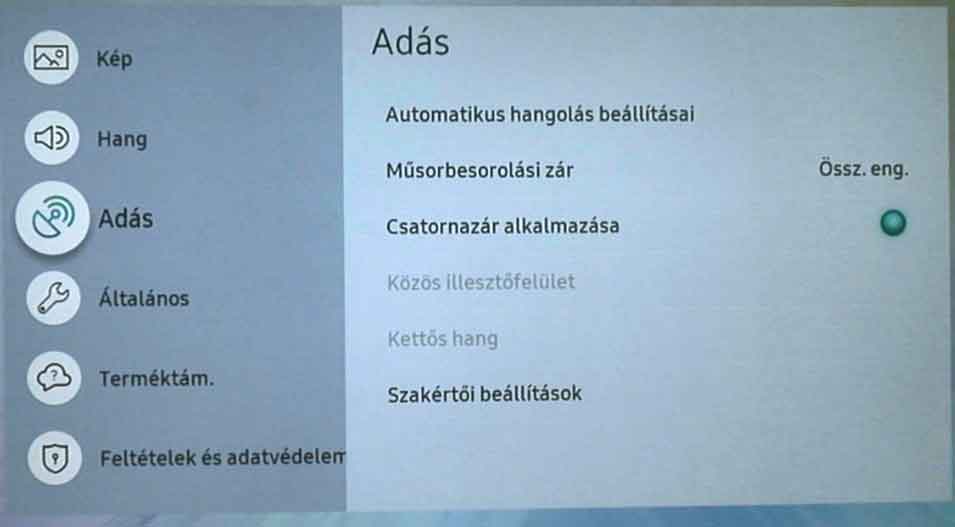
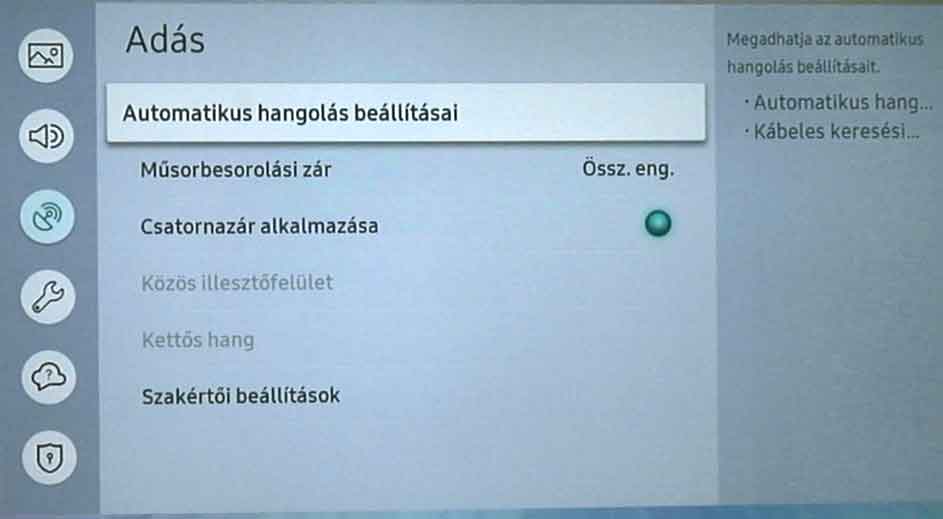
This enters the broadcasting settings, where you will find additional configuration options.
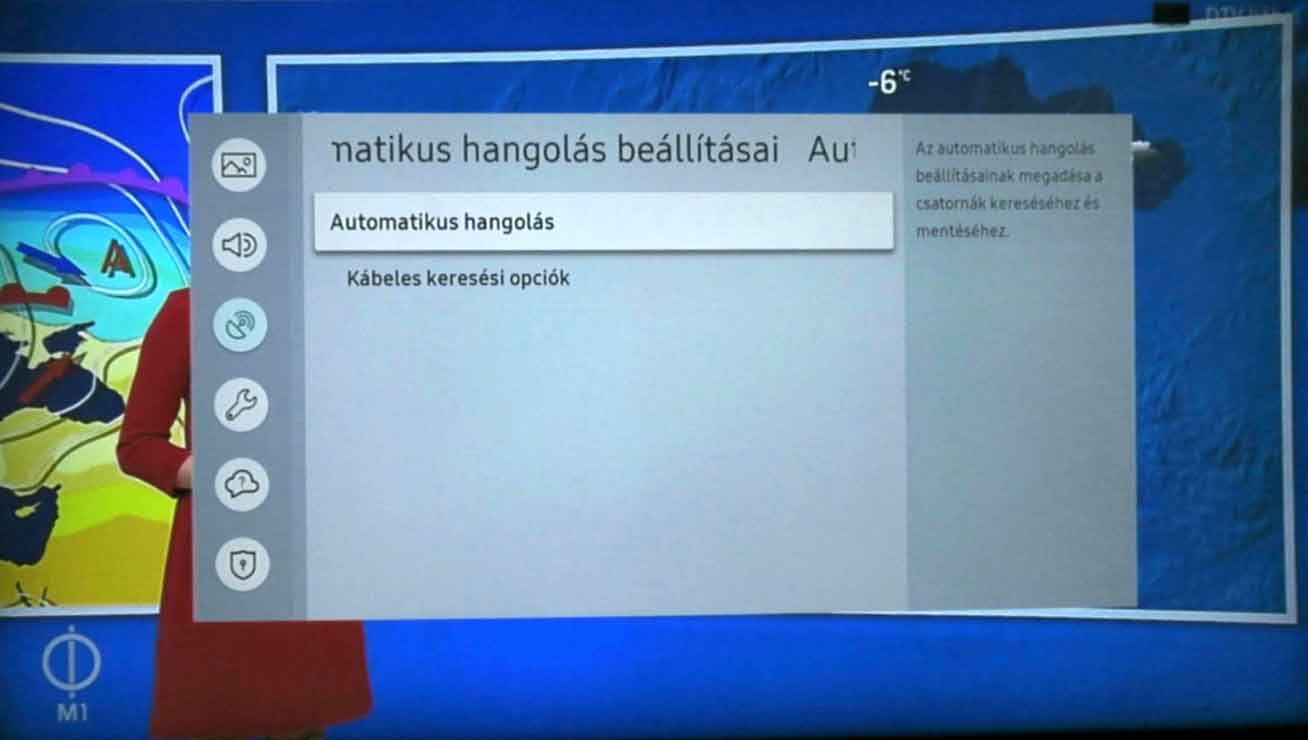
You can navigate here using the up or down arrows, but stay on the Auto Tuning Settings (Automatikus hangolás beállításai) option and press the OK button on the remote control.
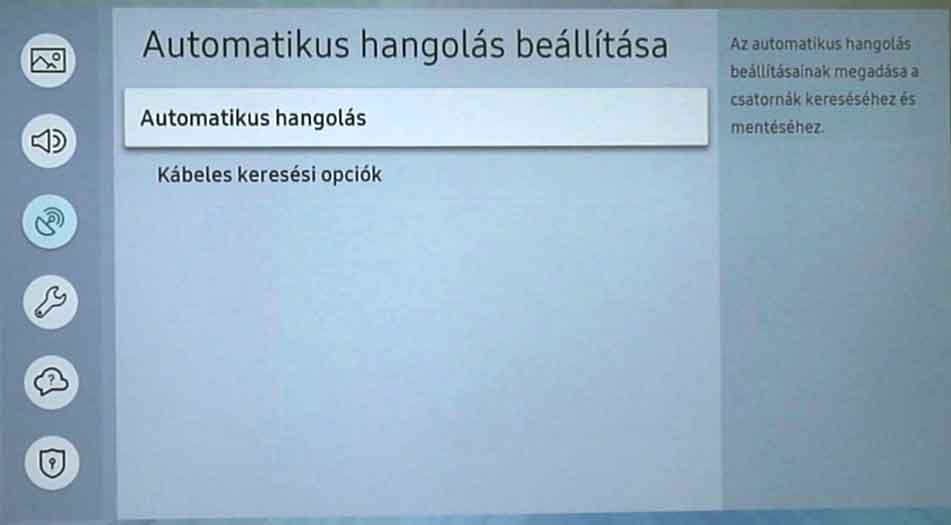
On the next screen, also select the Auto Tuning (Automatikus hangolás) menu item by pressing the OK button on the remote.
You will then receive a message:
"To search and save channels, press the Start button. Note: searching will delete the existing channel list."
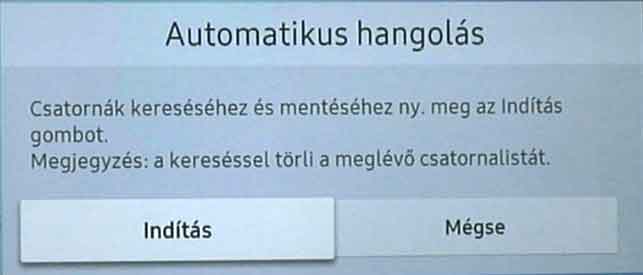
By default, Start (Indítás) is selected (indicated by the subtle shadow behind it). Press it using the OK button on the remote control.
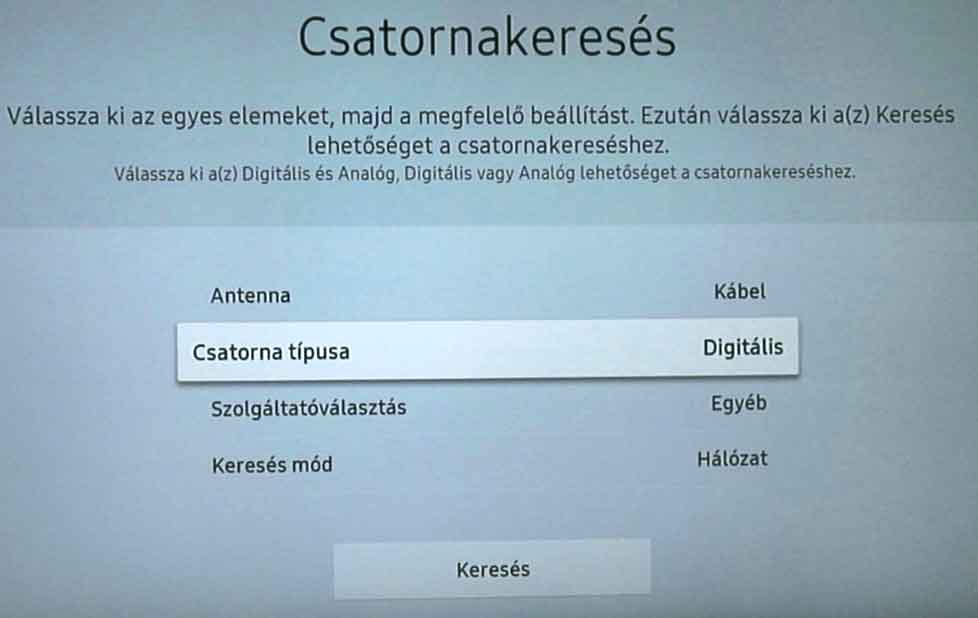
The next screen displays "Channel Search", where you can configure "Antenna", "Channel Type", "Provider Selection", and "Search Mode".
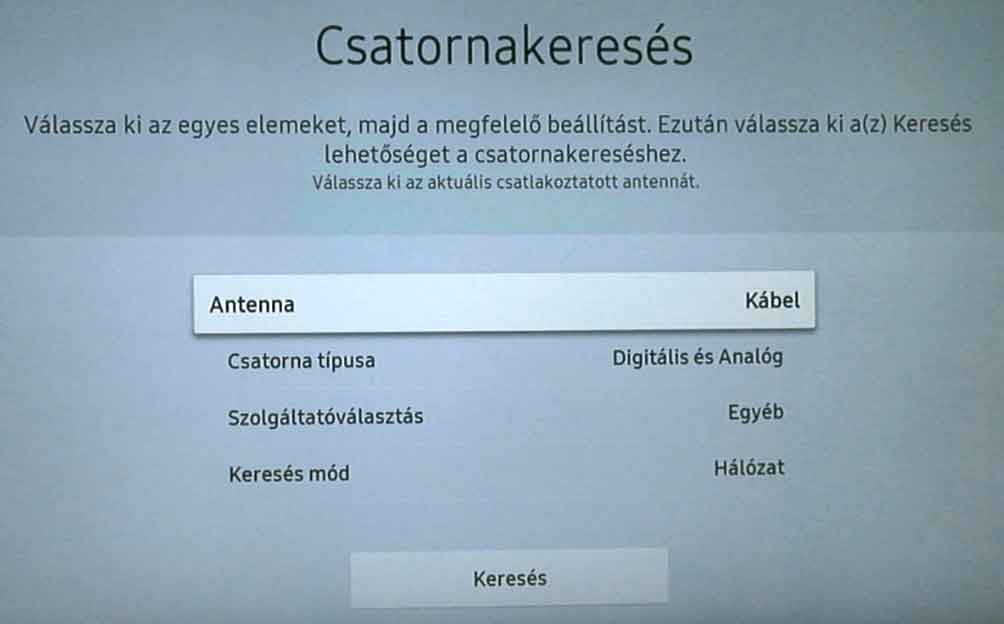
Check if Cable (Kábel) is selected for the Antenna option.
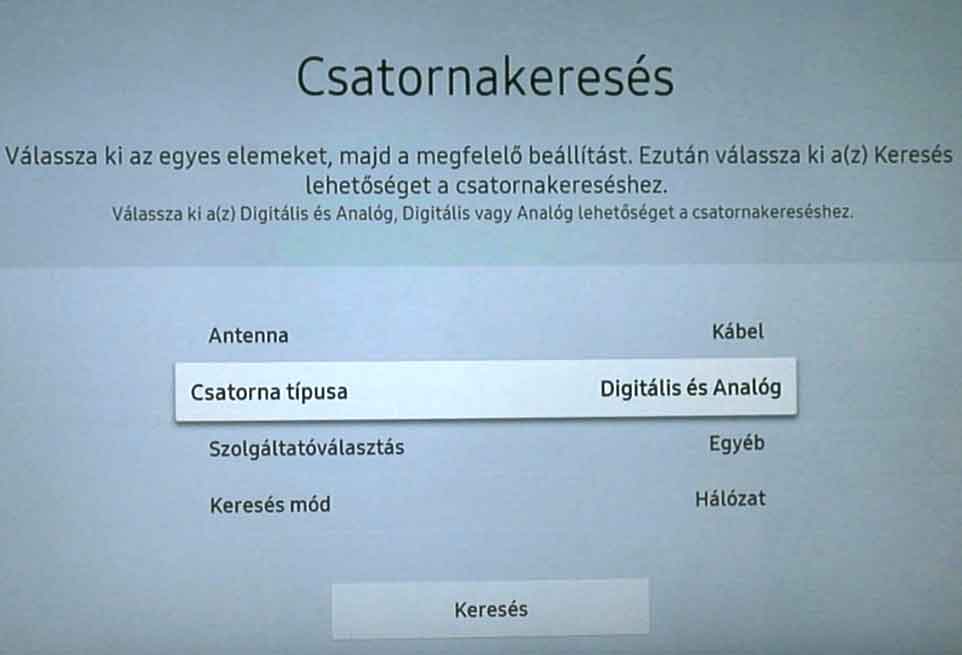
If yes, use the down arrow on the remote to select Channel Type (Csatorna típusa), press OK, then select the Digital (Digitális) option in the pop-up window and press the remote's OK button to confirm the selection.
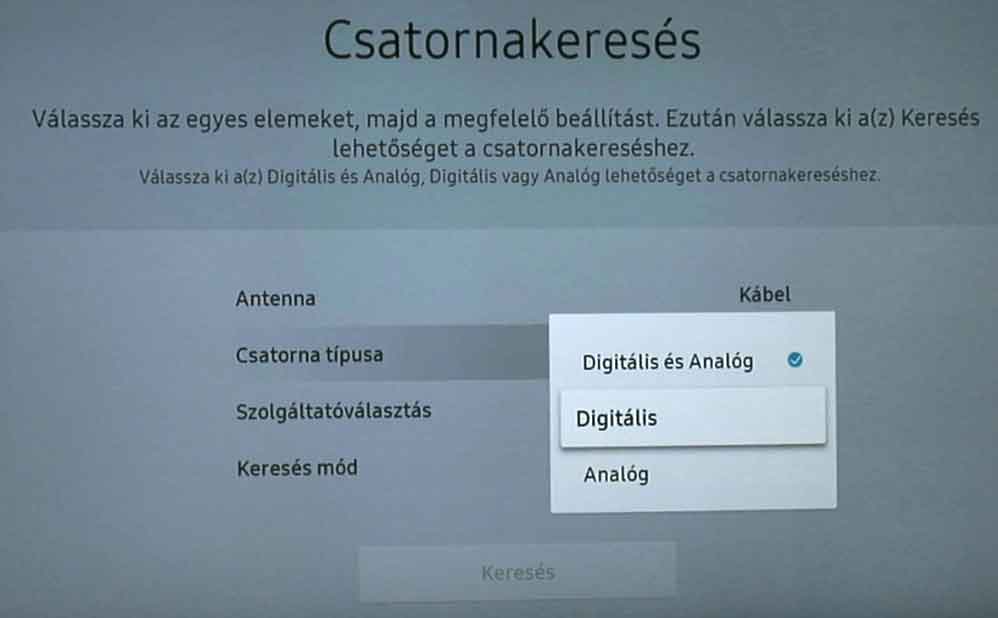
This configures the selected item. In this case, Channel Type is set to Digital.
Navigate to the Search (Keresés) button at the bottom, then press it.
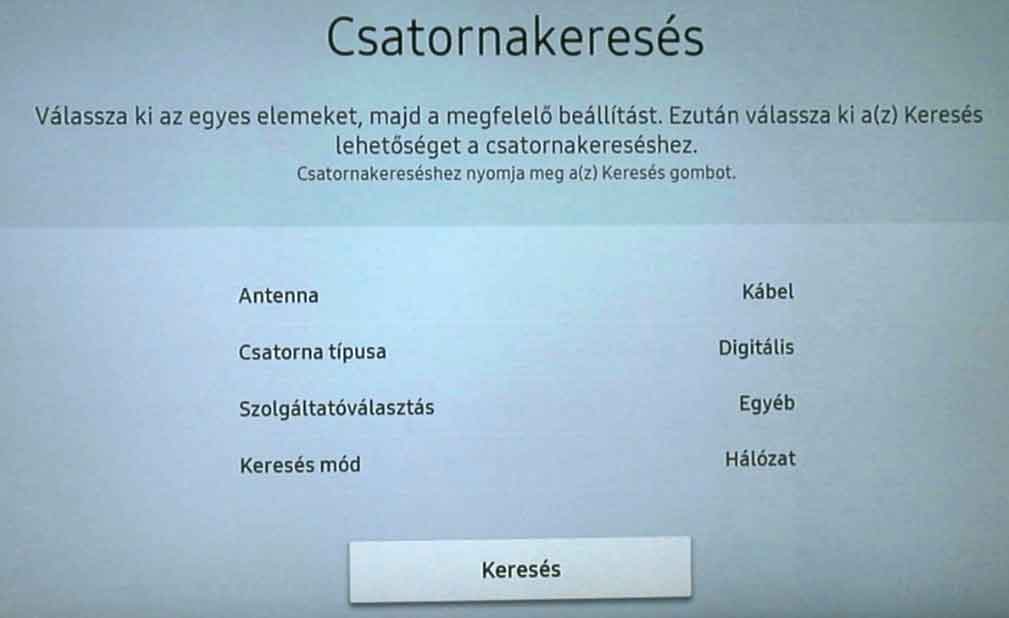
The search process may take several minutes; please be patient. During the search, you can interrupt the process with the "Stop" button. DO NOT PRESS IT!
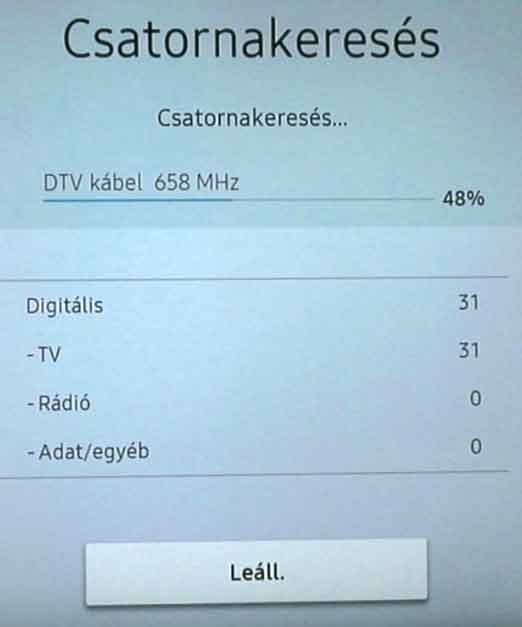
Wait as long as the "Stop" (Leállítás) button remains at the bottom of the screen.
When the search is complete, two buttons will appear: "Change Settings" and "Close". Above them, you can see the number of found channels.
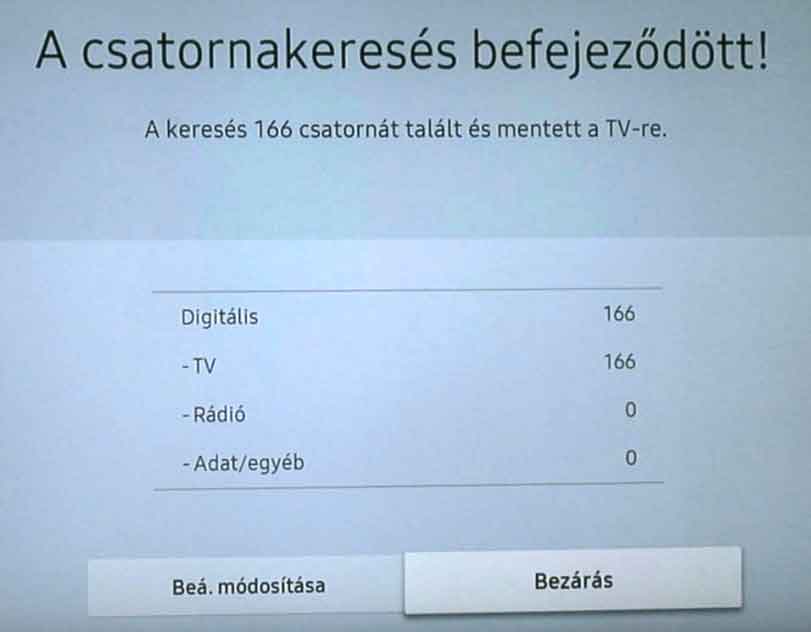
Once the search is finished, you will be informed about the found channels. Press the Close (Bezárás) (shadowed) button on the remote control.

After successful tuning, the first TV channel will appear in the background.
You are now back on the previous screen. Press the Exit, Return, or Back button on your remote control to close the Settings window completely.
The device has been successfully configured. Congratulations!
Press the Menu button located above the 4 arrows on the remote control.
(On some remote controls, this is located to the top-left of the arrows, on others, it is below the arrows.)

The settings options will now appear on the screen. (Picture, Sound, Channel, Network, System, ...)
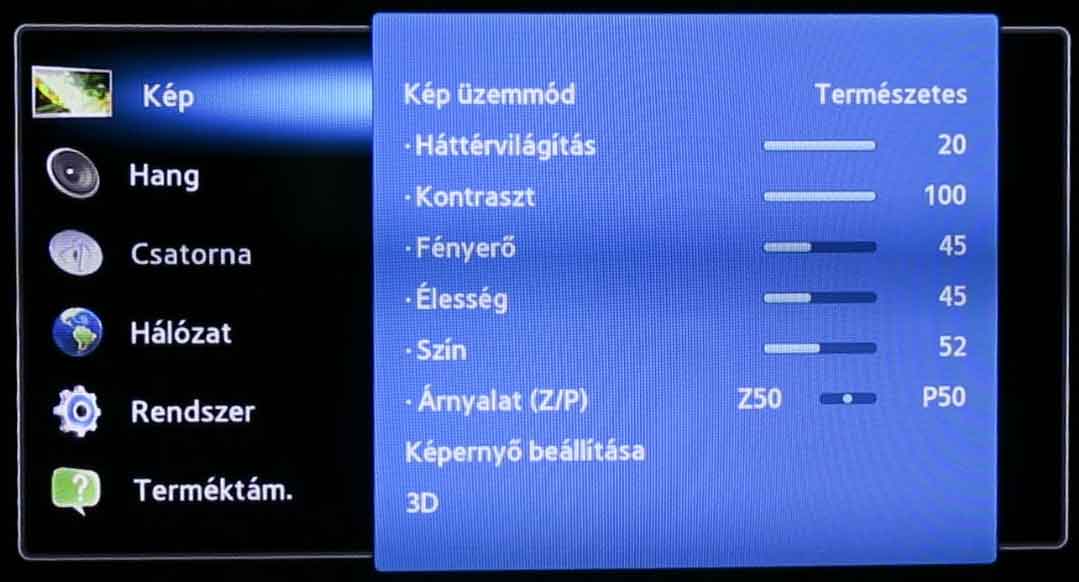
On the screen that appears, use the up and down arrows on the remote control to select the Channel (Csatorna) menu item,
then press the button in the middle of the arrows, usually labeled "OK".
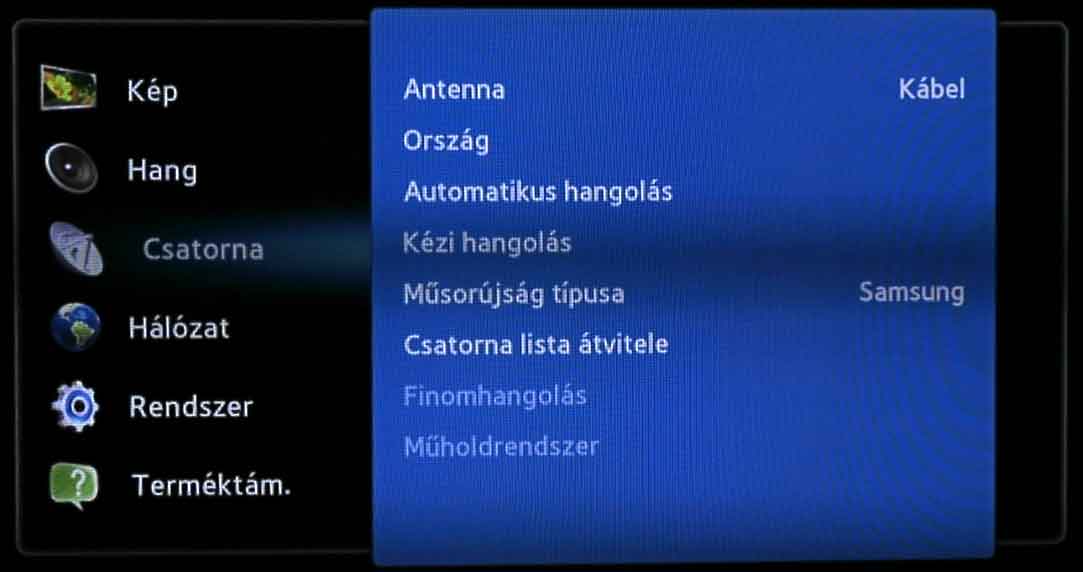
The list of settings belonging to the Channel menu item will now be displayed.
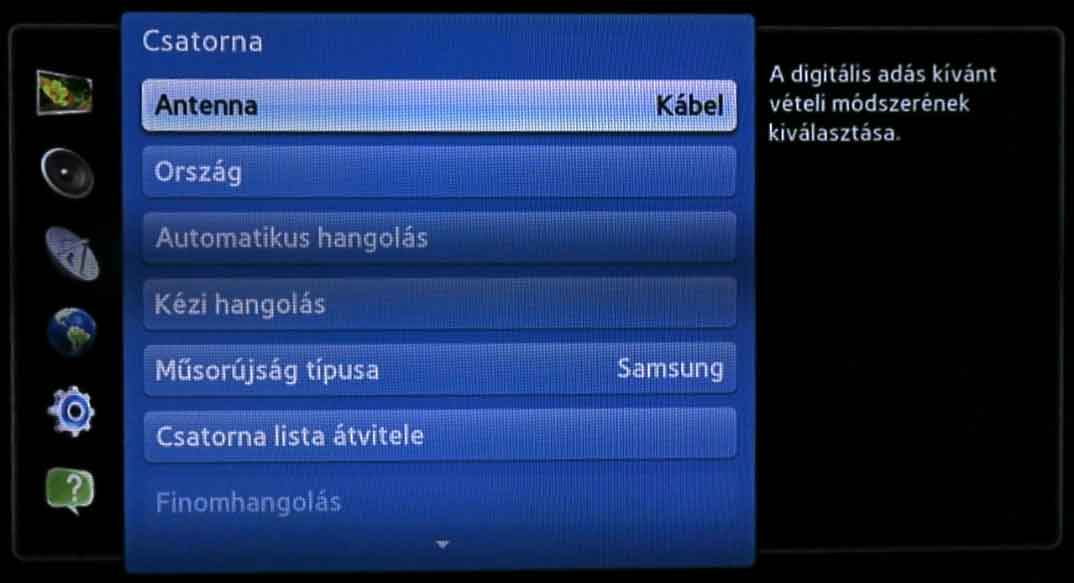
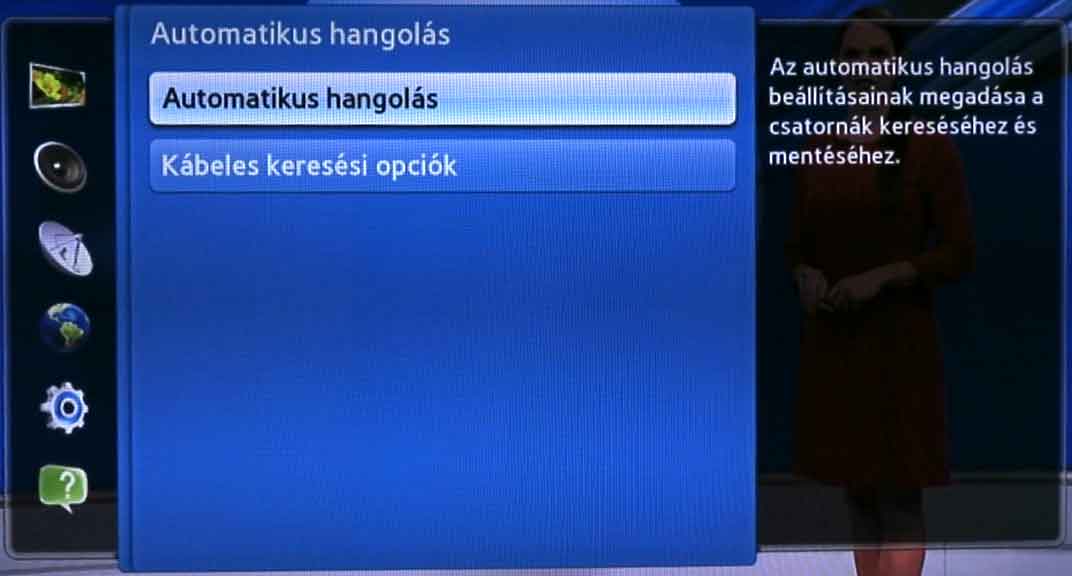
Use the down arrow on the remote control to select the Auto Tuning (Automatikus hangolás) menu item and press the OK button on the remote control.

From the list that appears, select the Auto Tuning menu item again.
Since this is the first menu item, you only need to press the OK button.
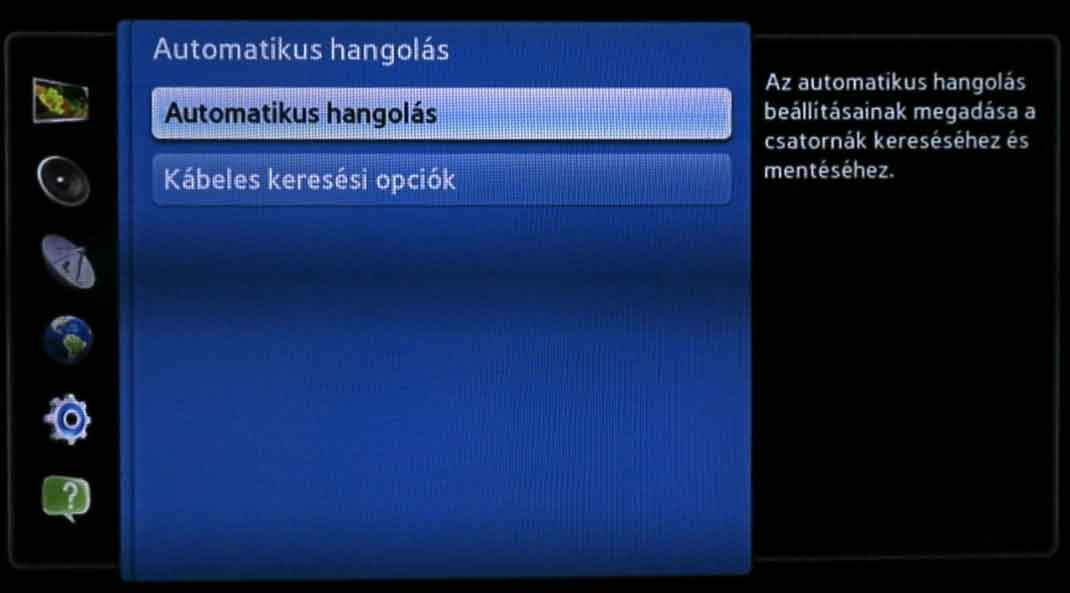
On the right side of the information window that appears, select the button labeled Start (Indítás) (usually with a blue background) and press it using the OK button on the remote control.

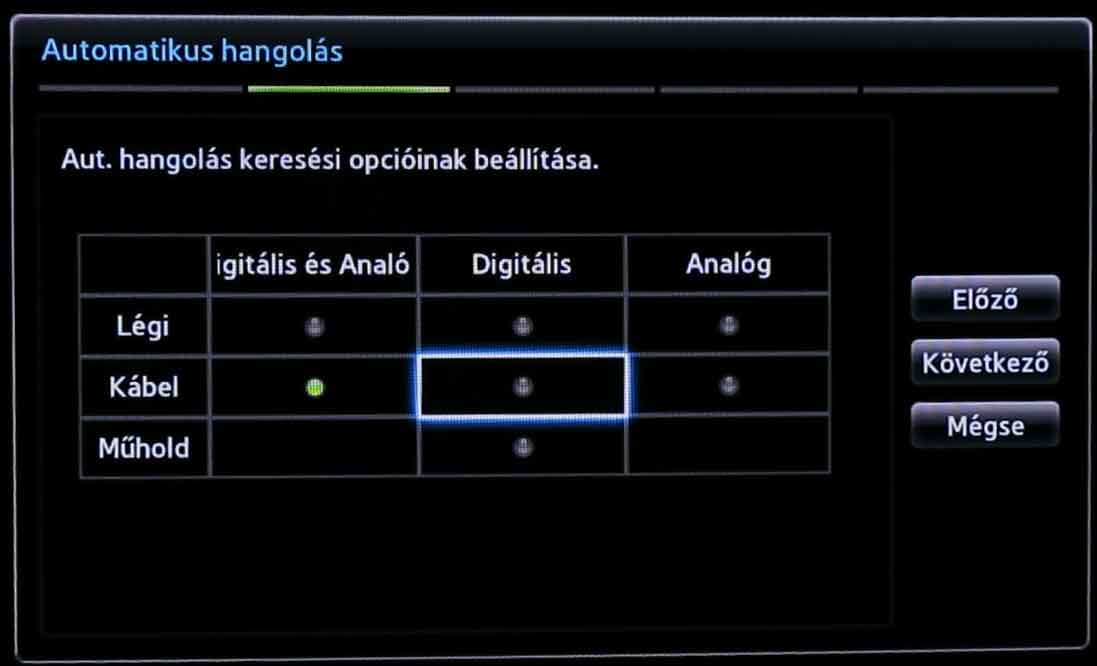
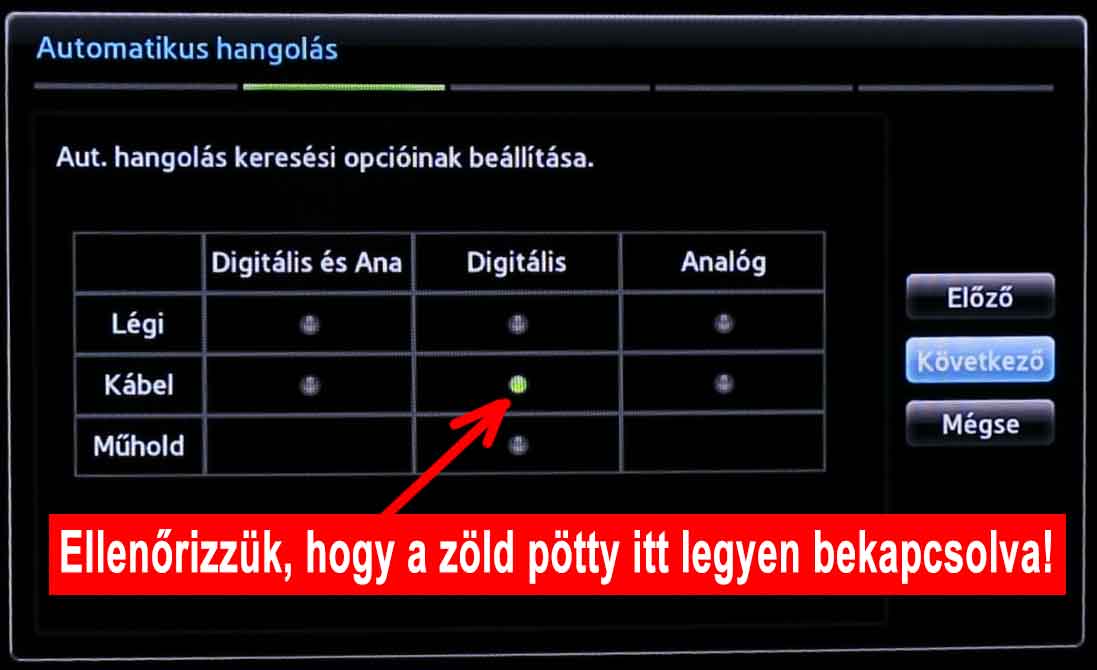
In the table that appears, use the arrows to navigate to the cell at the intersection of Cable (Kábel) and Digital (Digitális), and mark it with the remote's OK button.
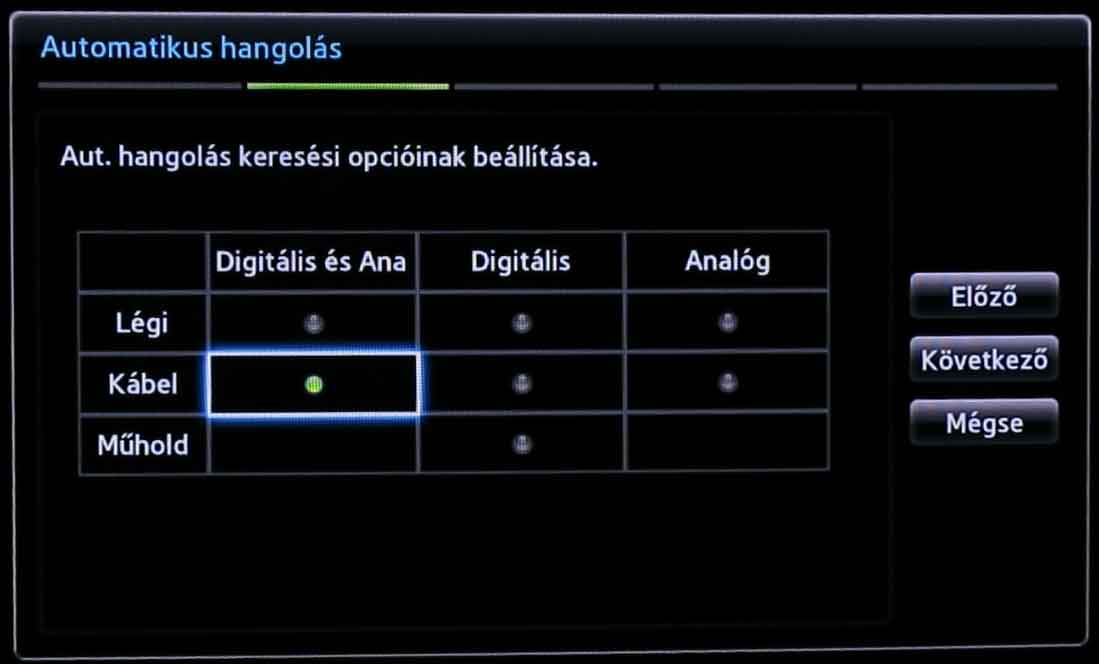
A successful selection is indicated by the dot in the middle turning green.
Use the arrows to navigate to the button labeled Next (Következő) on the right side, and press it with the remote's OK button.
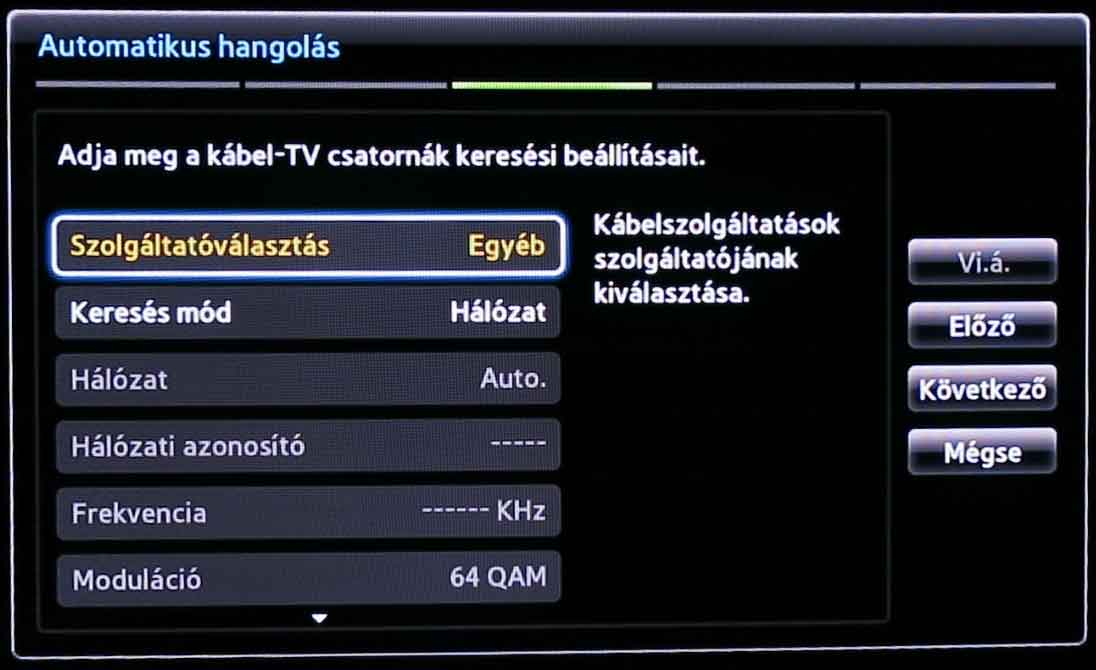
On the next screen, navigate to the "Next" button again and press it with the remote's "OK" button as well.

The channel search will now begin. Please wait patiently until it finishes.
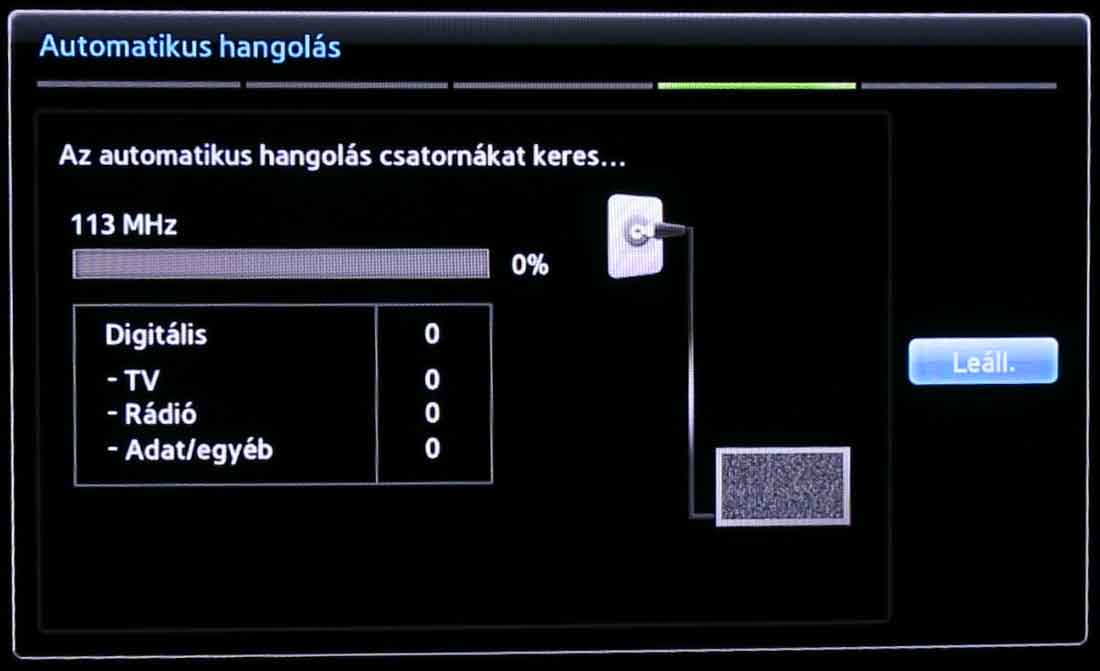
The search may take several minutes!
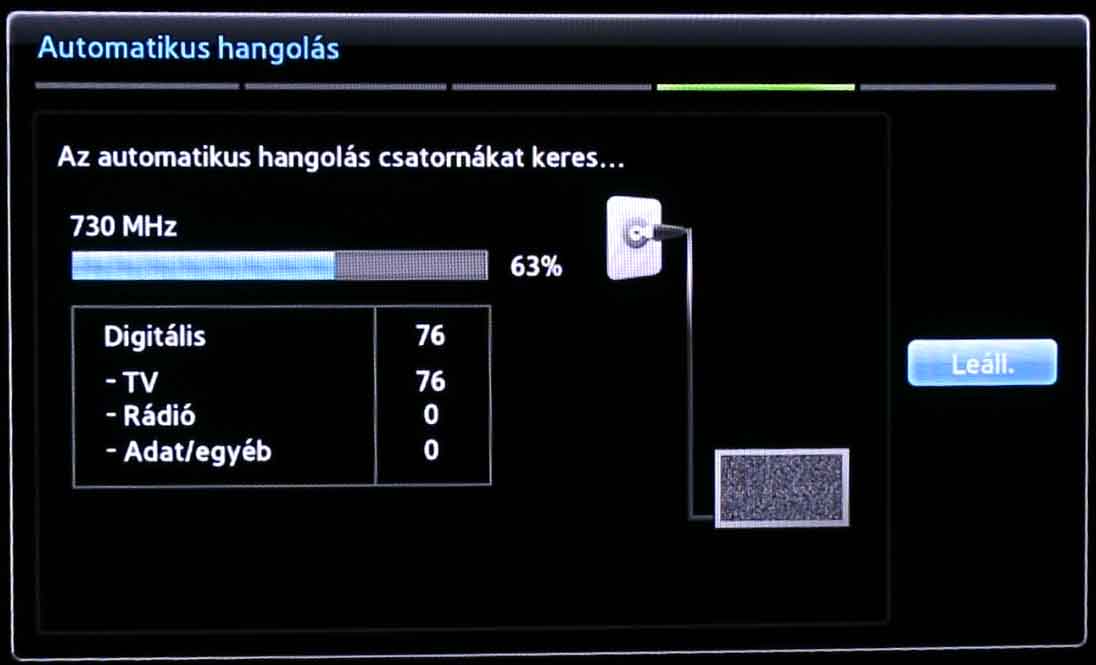
On the screen labeled Auto tuning completed, you can see the number of digital channels found.
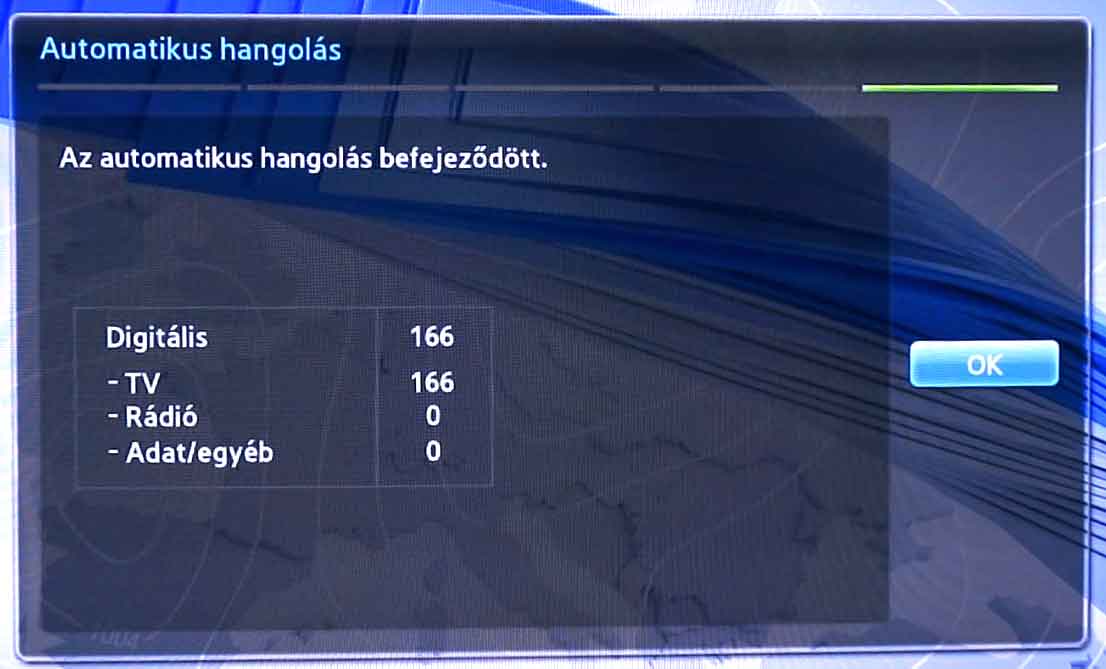
You can close this screen by pressing the OK button, and close the following screen with the remote's Exit button (or the Back button on certain remotes).
After successful tuning, the first TV channel will appear behind the settings screen. The device has been successfully retuned! Congratulations!
Press the Menu button located above the 4 arrows on the remote control.
(On some remote controls, this is located to the top-left of the arrows, on others, it is below the arrows.)

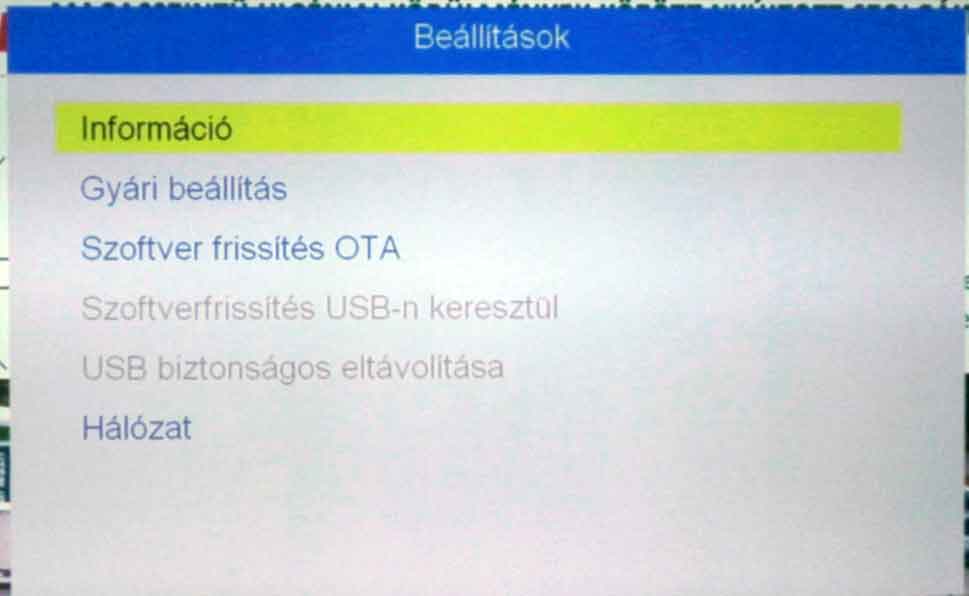
6 menu items will appear:
- Channel (Csatorna)
- Installation (Telepítés)
- System (Rendszer)
- Settings (Beállítások)
- Game (Játék)
- and Media Player
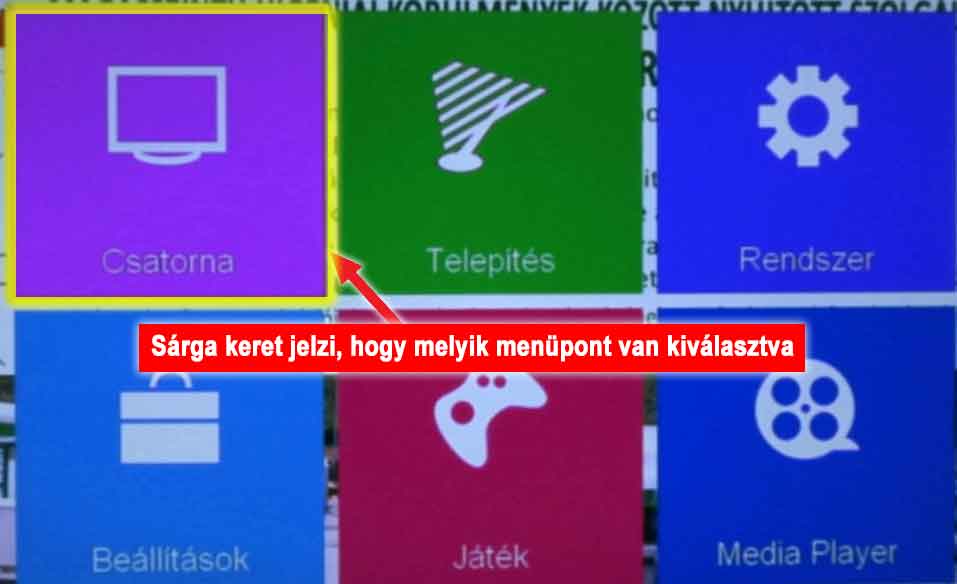
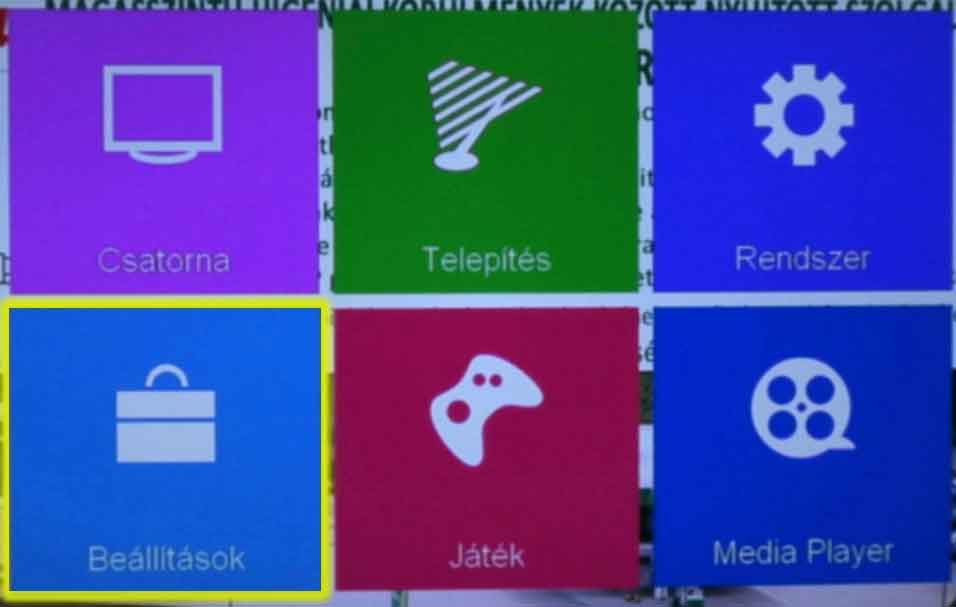
Use the arrows on the remote control to navigate to the Settings (Beállítások) menu item, then press the OK button on the remote.
(A yellow frame indicates the selected menu option)
You can navigate here using the up and down arrows on the remote. Under the Information submenu, select the Factory Reset (Gyári beállítás) submenu, then press the OK button in the middle of the arrows.
Start the Factory Reset process by pressing the OK button on the remote control.
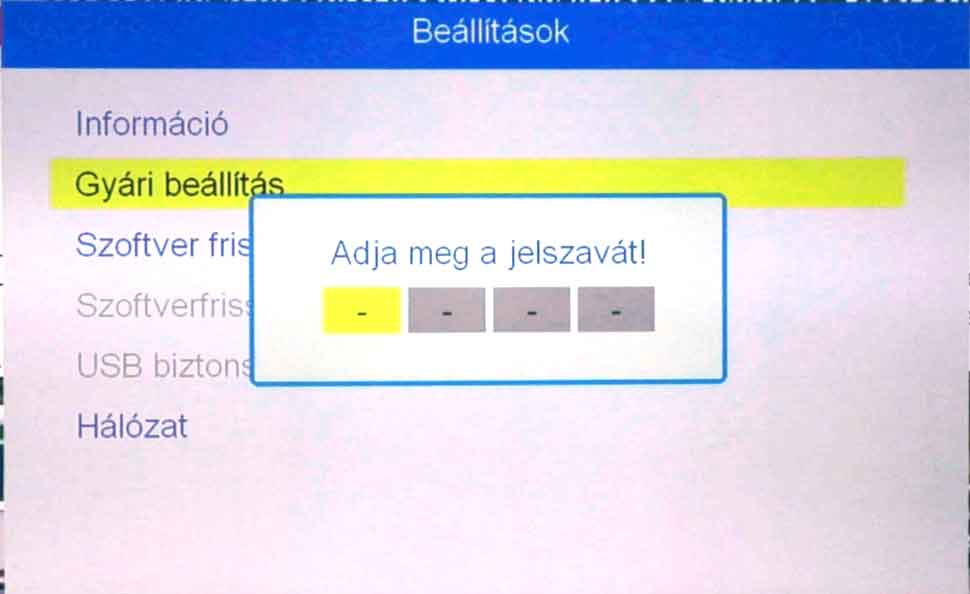
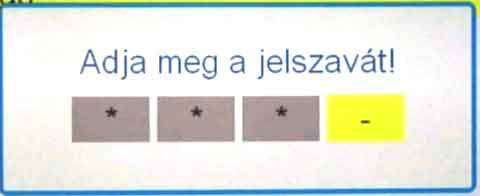
Enter the PIN code here. The password is four zeros. Press the 0 button four times in succession. The zeros entered will not be displayed; instead, asterisk characters will appear.
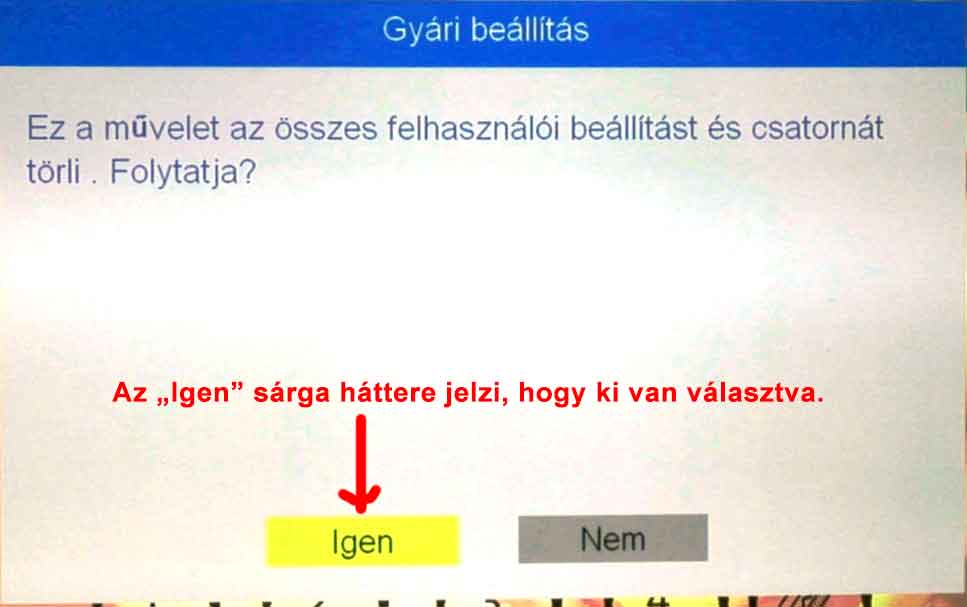
After entering the correct password, you will be asked: "This operation will delete all user settings and channels. Continue?"
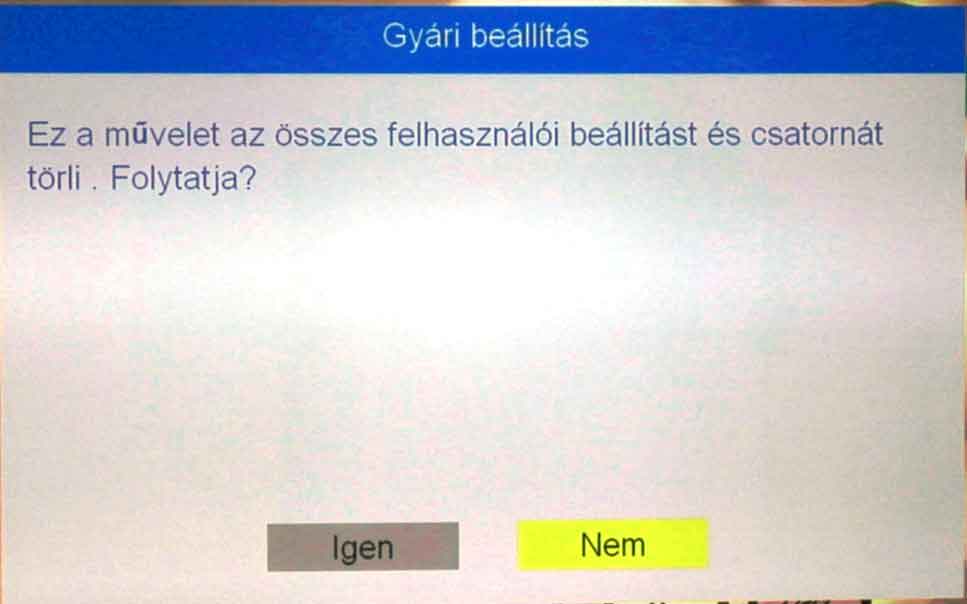
Use the left arrow to select the Yes (Igen) button. The selection is shown by the button's yellow background. Then press the OK button on the remote.
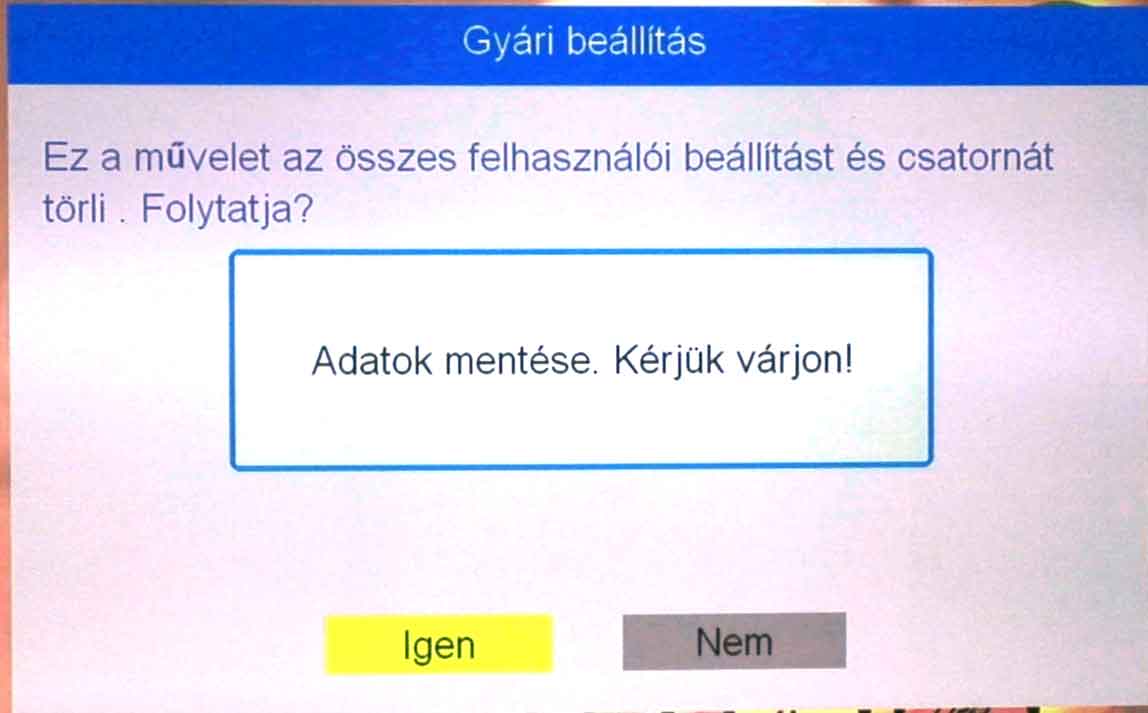
Following the factory reset, the device will reboot in a few moments.
Initially, the word TRIAX will appear in large letters, and then it will automatically enter the setup menu. The Settings screen will initially appear in a foreign language. Do not be alarmed.

After a short time, the menu will appear.
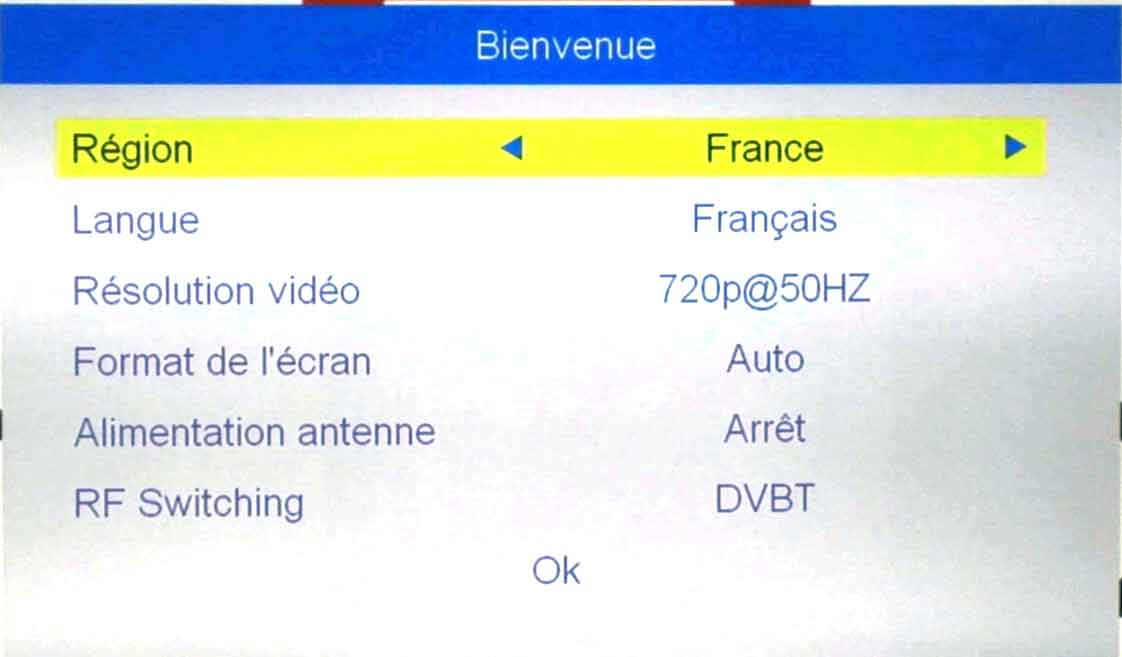
Press the down arrow on the remote to select the Langue (Language) option, and search for the Magyar (Hungarian) language using the left or right arrows on the remote.
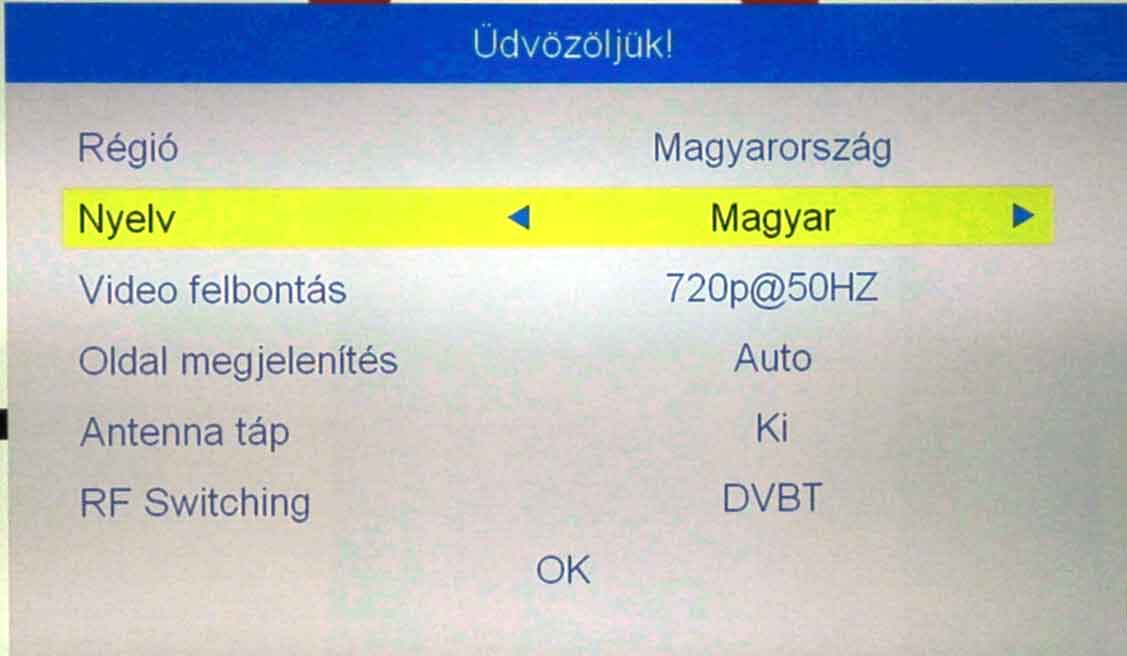
Then return to the Region (Régió) setting by pressing the up arrow on the remote, and set it to Magyarország (Hungary) as described previously.
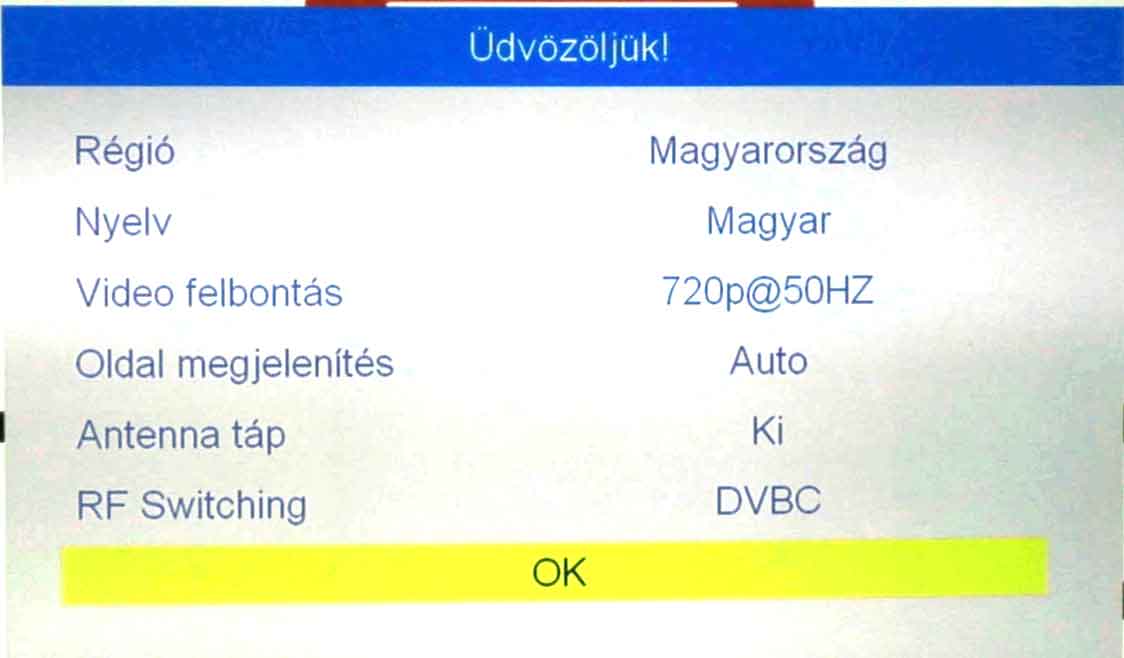
Use the down button on the remote to select the RF Switching option, and press the left or right arrow repeatedly until the DVBC option appears.
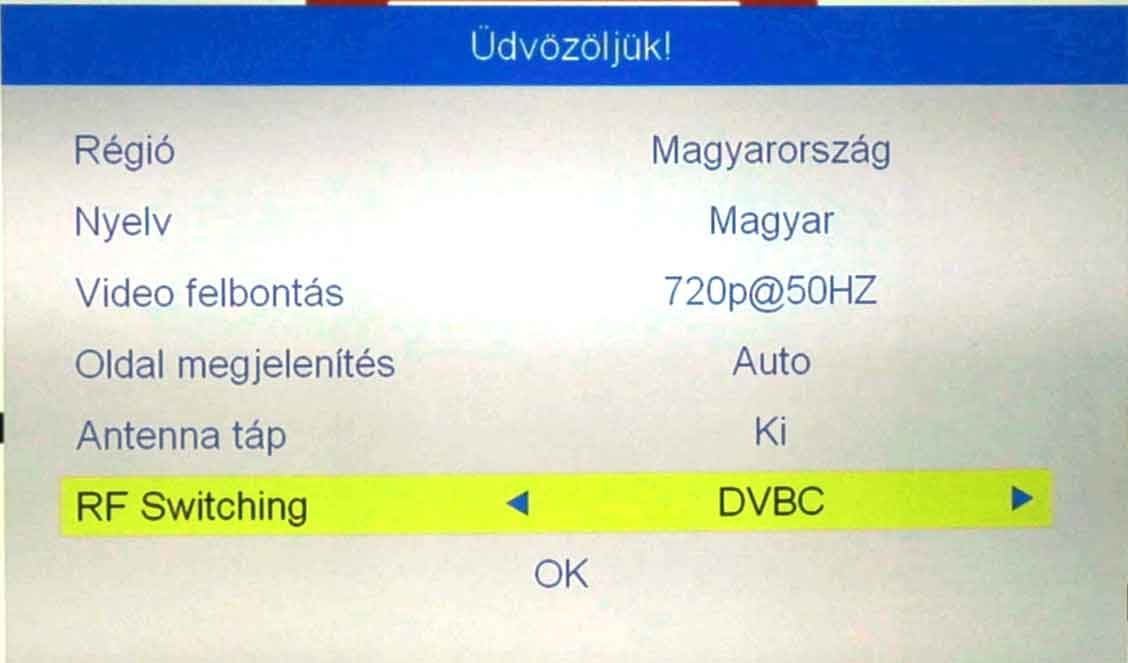
Use the down arrow to select the OK button, and press the OK button on the remote control.
(Press the "EXIT" or "Back" button on the remote here to return to the main menu.)
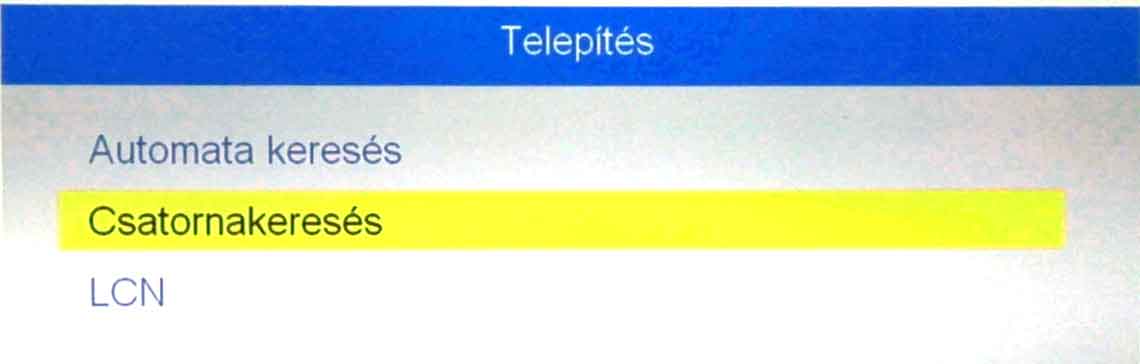
Use the remote's arrows to navigate to the Installation (Telepítés) menu and launch it with the OK button.

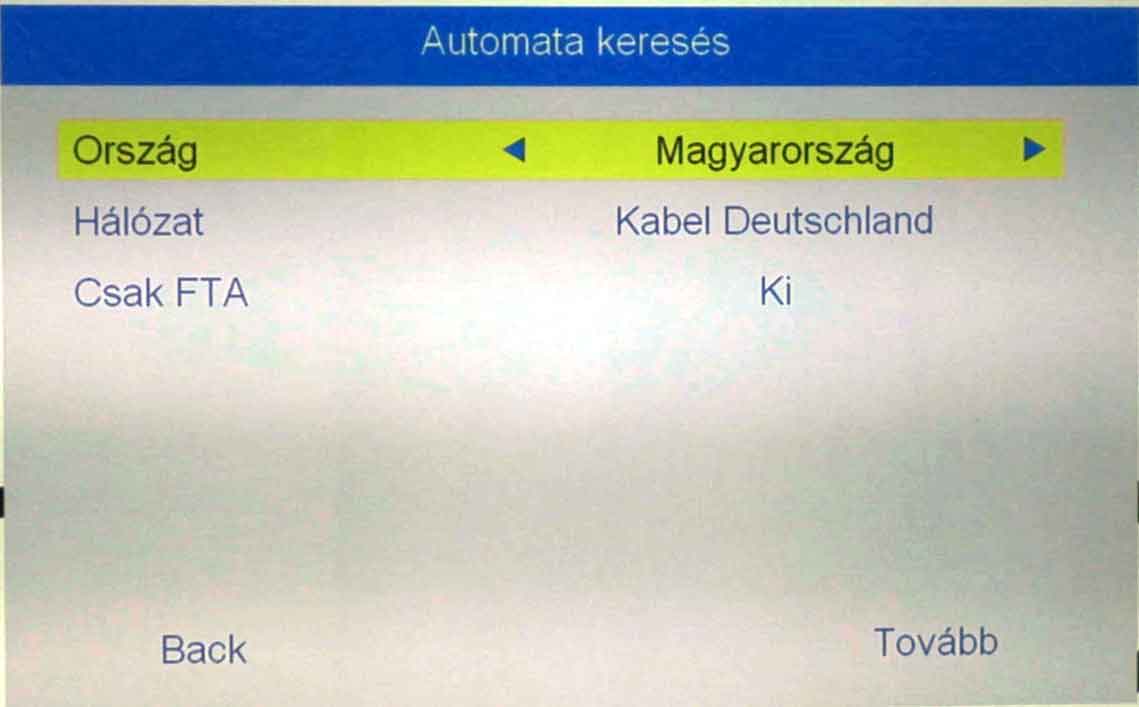
In the Installation window, under Auto Search, select the Channel Search (Csatornakeresés) submenu option.
On the following Quick Search (Gyors keresés) screen, adjust the values as follows. You can navigate and change values using the remote control arrows.
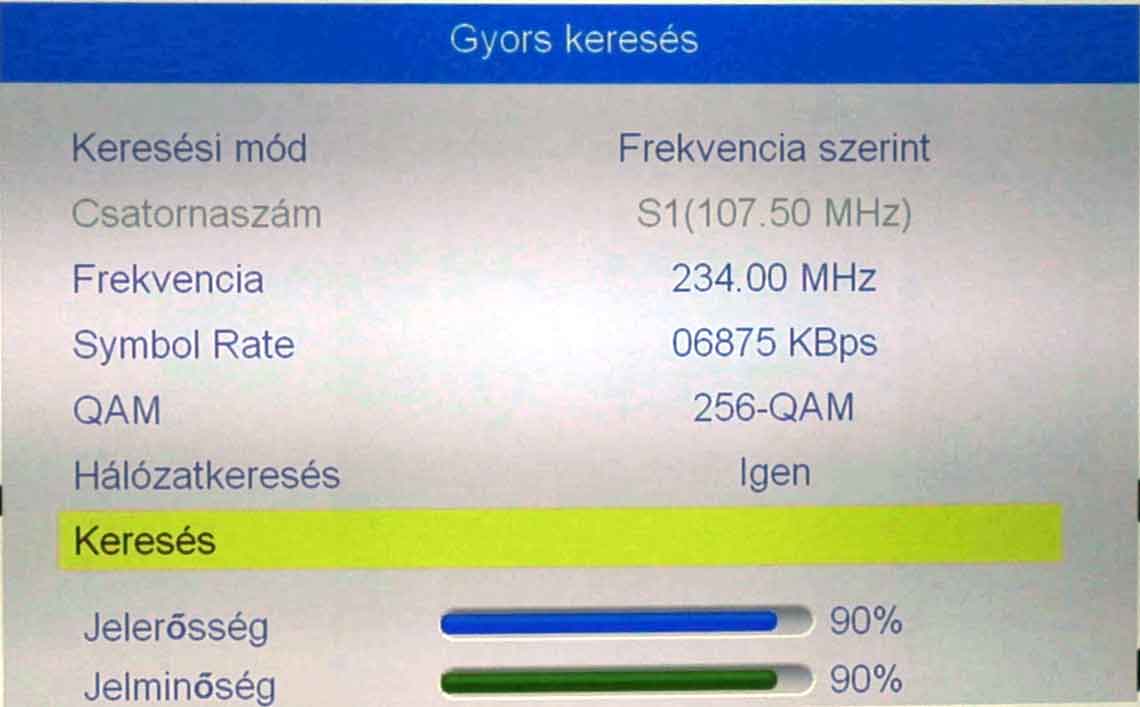
Set the Search Mode to By Frequency (Frekvencia szerint).
For Frequency, type in 234.00 MHz using the numeric buttons by pressing 2, 3, 4, 0, and 0.
Change the Symbol Rate value to 06875 KBps using the remote's number keys.
Set the QAM value to 256 using the left or right arrows if necessary.
Toggle Network Search (Hálózatkeresés) to Yes (Igen), then navigate to the Search option and press OK on the remote control.
After several minutes, the message "Mentés, kérjük várjon!" (Saving, please wait!) will appear.
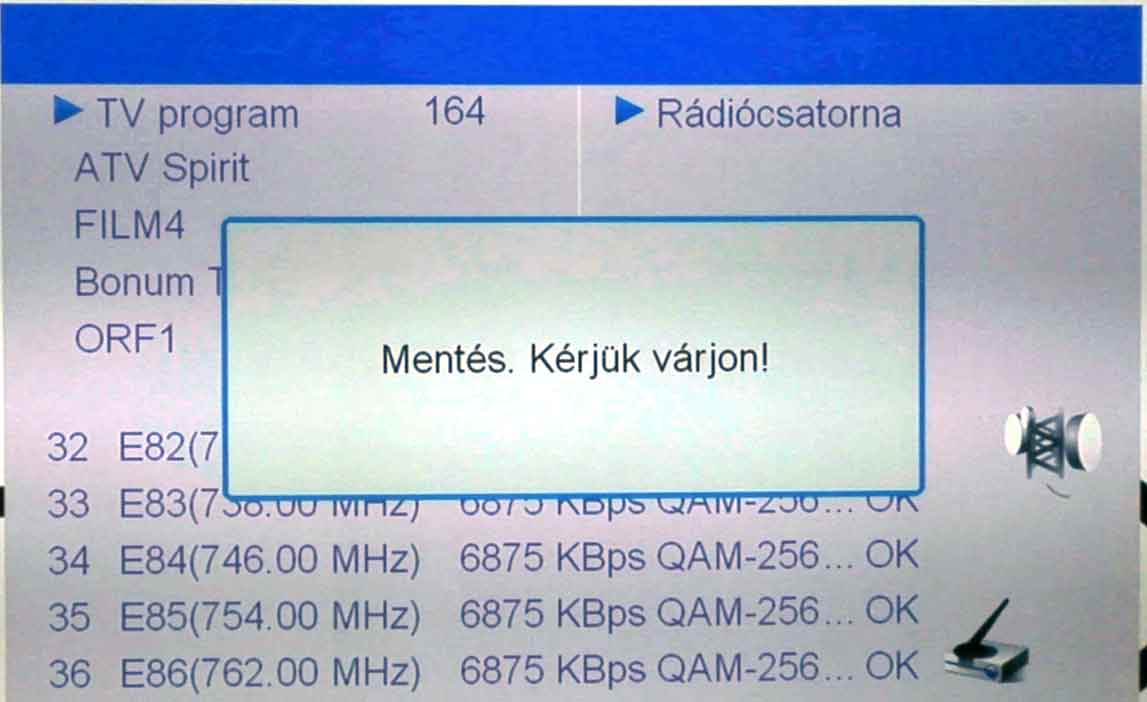
After a few moments, the settings screen will automatically disappear, and you can watch your favorite shows. If it does not close automatically, press the Exit or Back button.

The device has been successfully configured! Congratulations!
You need to enter the following link into the address bar of any browser (Internet Explorer, Mozilla Firefox, Opera, Chrome): https://webmail.saghysat.hu/
Username: if the email address is valami@saghysat.hu, then valami@saghysat.hu. The password is the one received upon registration.
The webmail interface functions similarly to email client software (e.g., Outlook Express).
E.g., if the email address is: valami@saghysat.hu.
- IMAP Server: mail.saghysat.hu
- Port: 143
- Username: valami@saghysat.hu (according to the example above)
- Connection security: STARTTLS
- Authentication method: Normal password
- SMTP Server: smtp.saghysat.hu
- Port: 587
- Connection security: STARTTLS
- Authentication method: Normal password
- Username: valami@saghysat.hu (according to the example above)
Like most cable modems, the modems we use feature a standard 10 Base-T Ethernet connector. Through this, an UTP cable establishes a connection between the modem and the computer's network card.
The television and cable modem signals reach the user through the exact same physical medium; nevertheless, the two devices can be used simultaneously without interference because they use different frequencies.
A special type of virus that spreads independently by replicating itself in numerous copies. In the age of the Internet, the most successful worms infect and spread as attachments in electronic mail or by exploiting vulnerabilities in various systems.
A common connection point for network devices. Hubs are typically used in local area networks to connect computers and other devices. During operation, simpler passive hubs copy packets arriving at the input port as output to all other ports without interpretation or filtering, so every network device connected to that hub receives it. In contrast, active or intelligent hubs interpret the received packets and forward them only to the port where the packet's destination is located. This requires a more complex device, which, however, provides much greater bandwidth, as it also enables parallel traffic between different nodes.
A signal converter device that connects the computer to the cable television network; compared to traditional telephone modems, a cable modem is capable of data transmission at a speed that is an order of magnitude higher (Mbit/s).
Thomson modem, Lancity modem, CISCO modem, Arris modem
The cable internet service utilizes the cable television provider's network for high-speed data transmission. There are no telephone costs when using the internet, only a fixed, predictable monthly fee. The service allows for unlimited use in terms of both time and data volume.
(Media Access Control) A unique, program-readable number used to uniquely identify network devices (network card, router). This identifier is unique for every device connected to a network. It consists of 12 characters, and it can include letters from the English alphabet from A to F and digits from 0 to 9. The Internet Service Provider identifies subscribers based on the MAC number and the assigned IP address. Querying the network card's MAC number under Windows XP: Start - Run - cmd - ok. Typing the following line into the command prompt: ipconfig /all and then pressing Enter will display the result in the Physical Address line.
An intelligent network device whose task is to forward incoming data packets toward the destination via the most optimal route. To perform this task, routers maintain a routing table, based on which they can decide which node directly accessible by them should receive the packet currently being processed so that it reaches the destination via the shortest path. On the Internet, every intermediate station performs routing functions as well.
Unsolicited commercial email, junk mail, also known as SPAM, which frequently floods mailboxes. According to its content, we distinguish several types: SPAM can be bulk business mail, mail organizing an MLM system, chain letters, etc. Their common characteristic is that these emails are sent out en masse by senders to the address lists available to them. Your email address can end up on these companies' address lists in several ways. Some of these include:
- They find your email address randomly.
- You subscribe to a newsletter whose publisher unscrupulously resells its clients' addresses.
- You display your own email address publicly on a website or in a newsgroup.
- If your email address is included in a letter that is forwarded by your acquaintances without deleting the history from it.
Getting off these address lists is very difficult, usually impossible; the only practical way to do so is to delete the email address, but this is very often not constructive. Therefore, it is practical to choose a SPAM filtering solution as a defense against SPAM, which removes the time and burden of reviewing and deleting SPAM from our shoulders.
Computer software capable of replicating and spreading itself. Unlike its biological counterpart, a software virus does not occur naturally but is created by programmers, who thus define its capabilities and the damage it can cause.
The unique identifier of computers connected to the Internet. According to the current standard, it consists of four decimal numbers separated by periods (the value of the numbers can be between 0 and 255), e.g., 192.168.102.98. Querying the network card's IP address under Windows XP: Start - Run - cmd - ok. Typing the following line into the command prompt: ipconfig and then pressing Enter will display the result in the IP address line.
In certain cases, remote assistance is available.
With the help of the program downloadable from here, by providing an identifier (ID) and a password (Password), we can take over your computer screen for the duration of the assistance, allowing us to help you efficiently and quickly.
IMPORTANT: We can ONLY access the screen while the program is running, and ONLY if you provide the ID and password. The program always generates a new password upon startup.